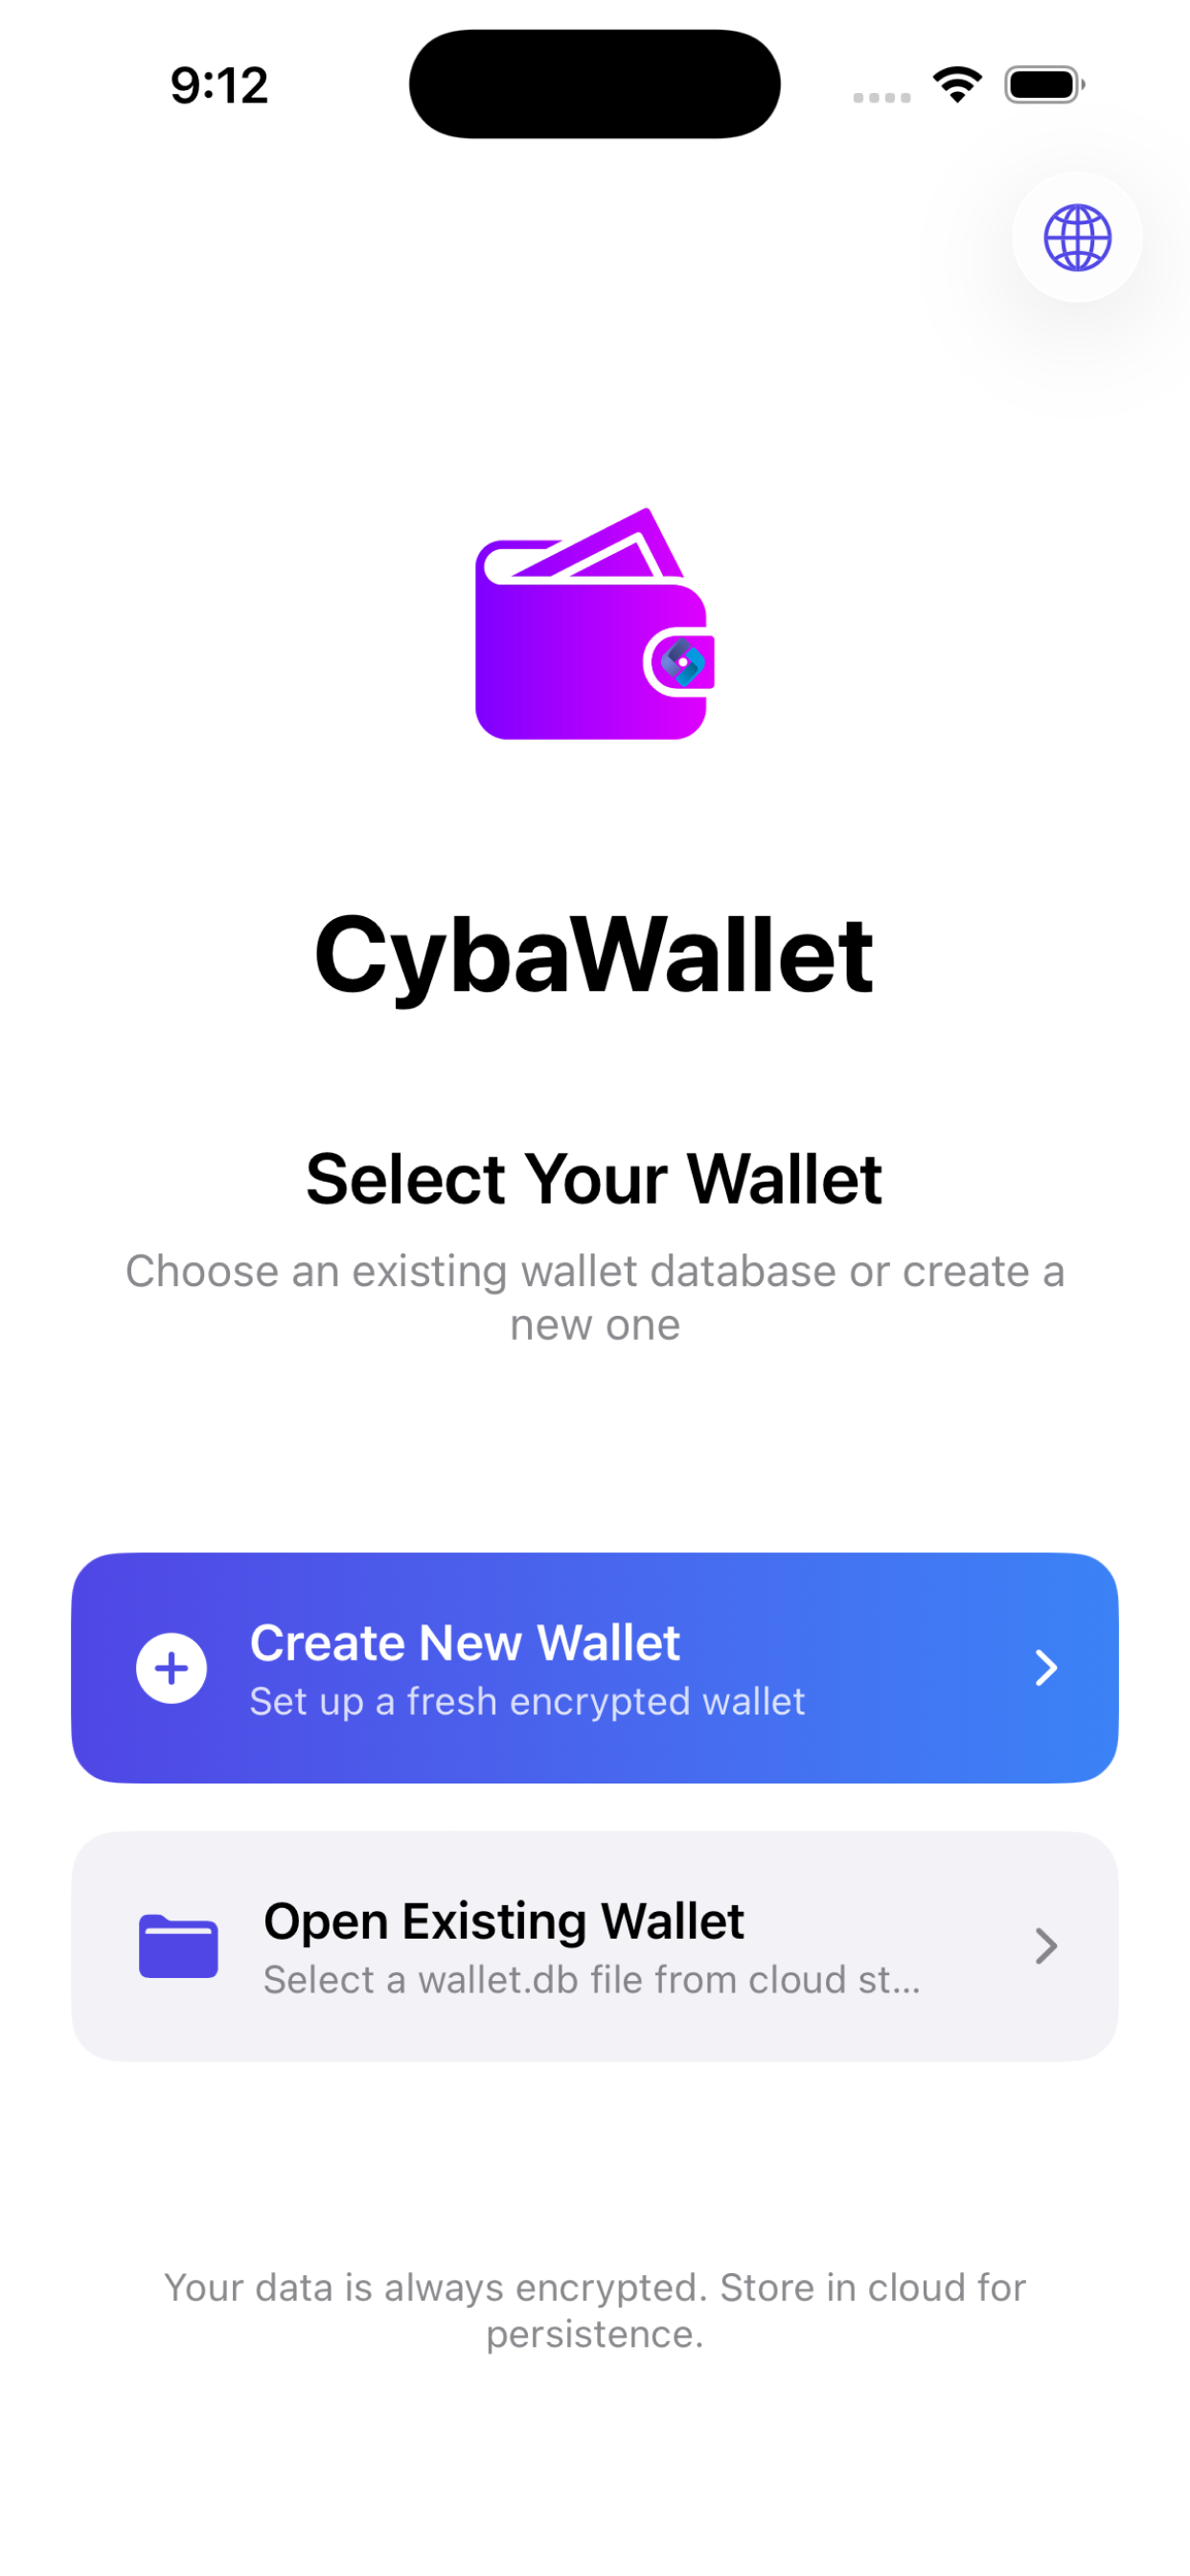
Getting Started
First Launch
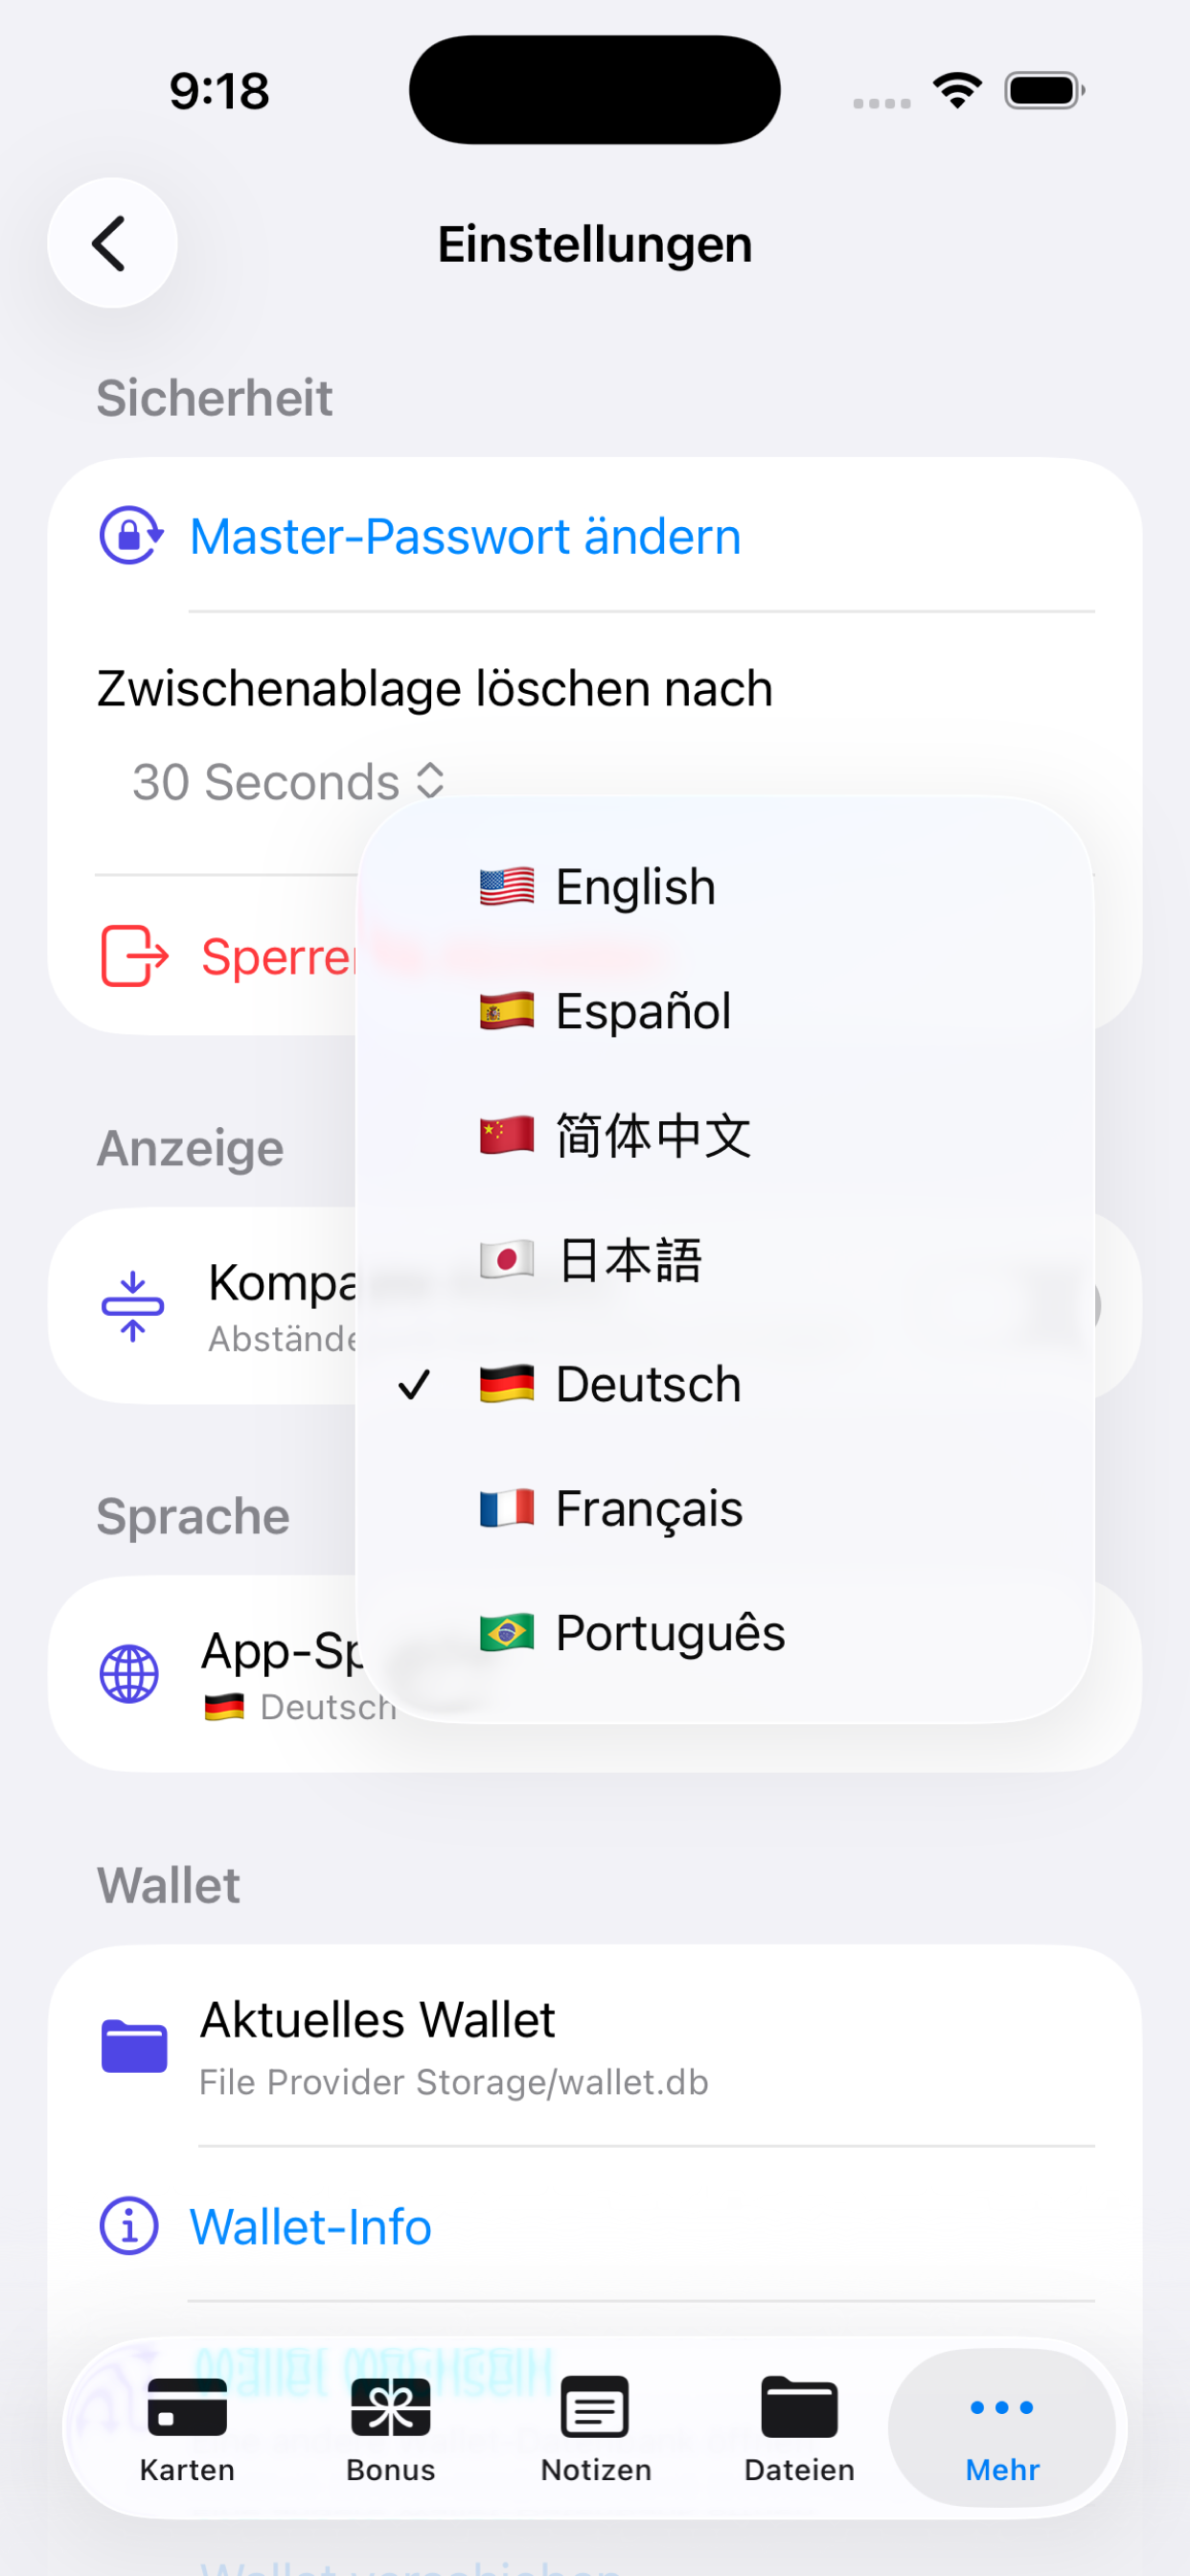
- Choose Language — Tap the 🌐 globe icon in the top-right corner to select your preferred language before setup begins.
- Welcome — Tap Get Started to begin setup.
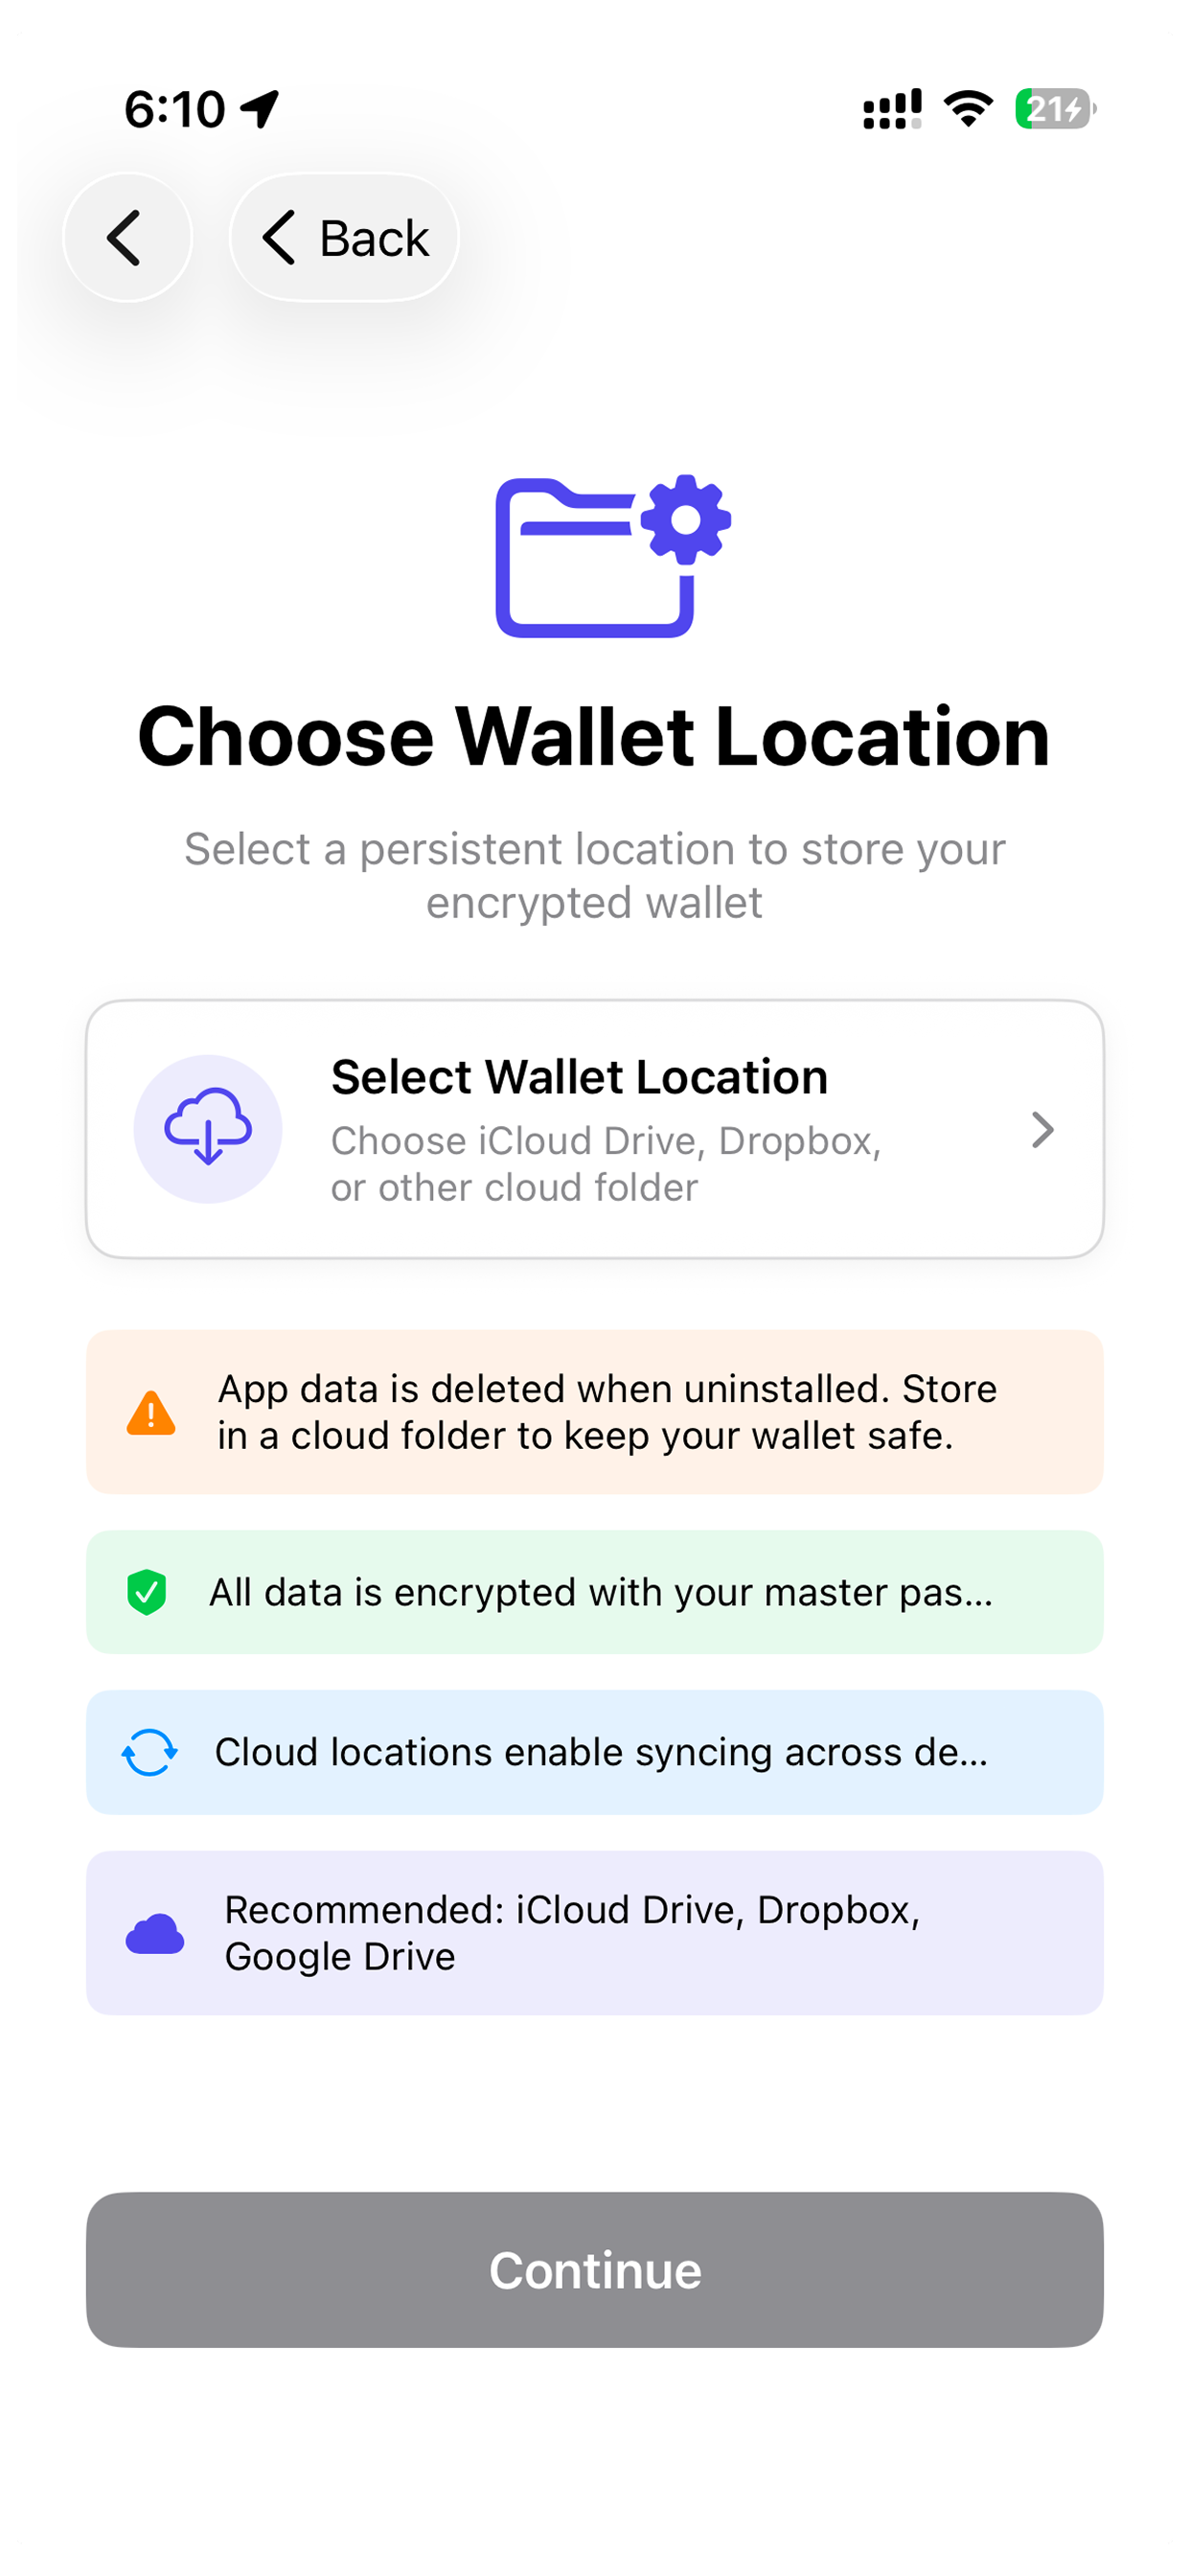
- Choose Wallet Location — Pick where your encrypted database is stored: iCloud Drive, Dropbox, Google Drive, or local. Cloud storage enables cross-device sync.
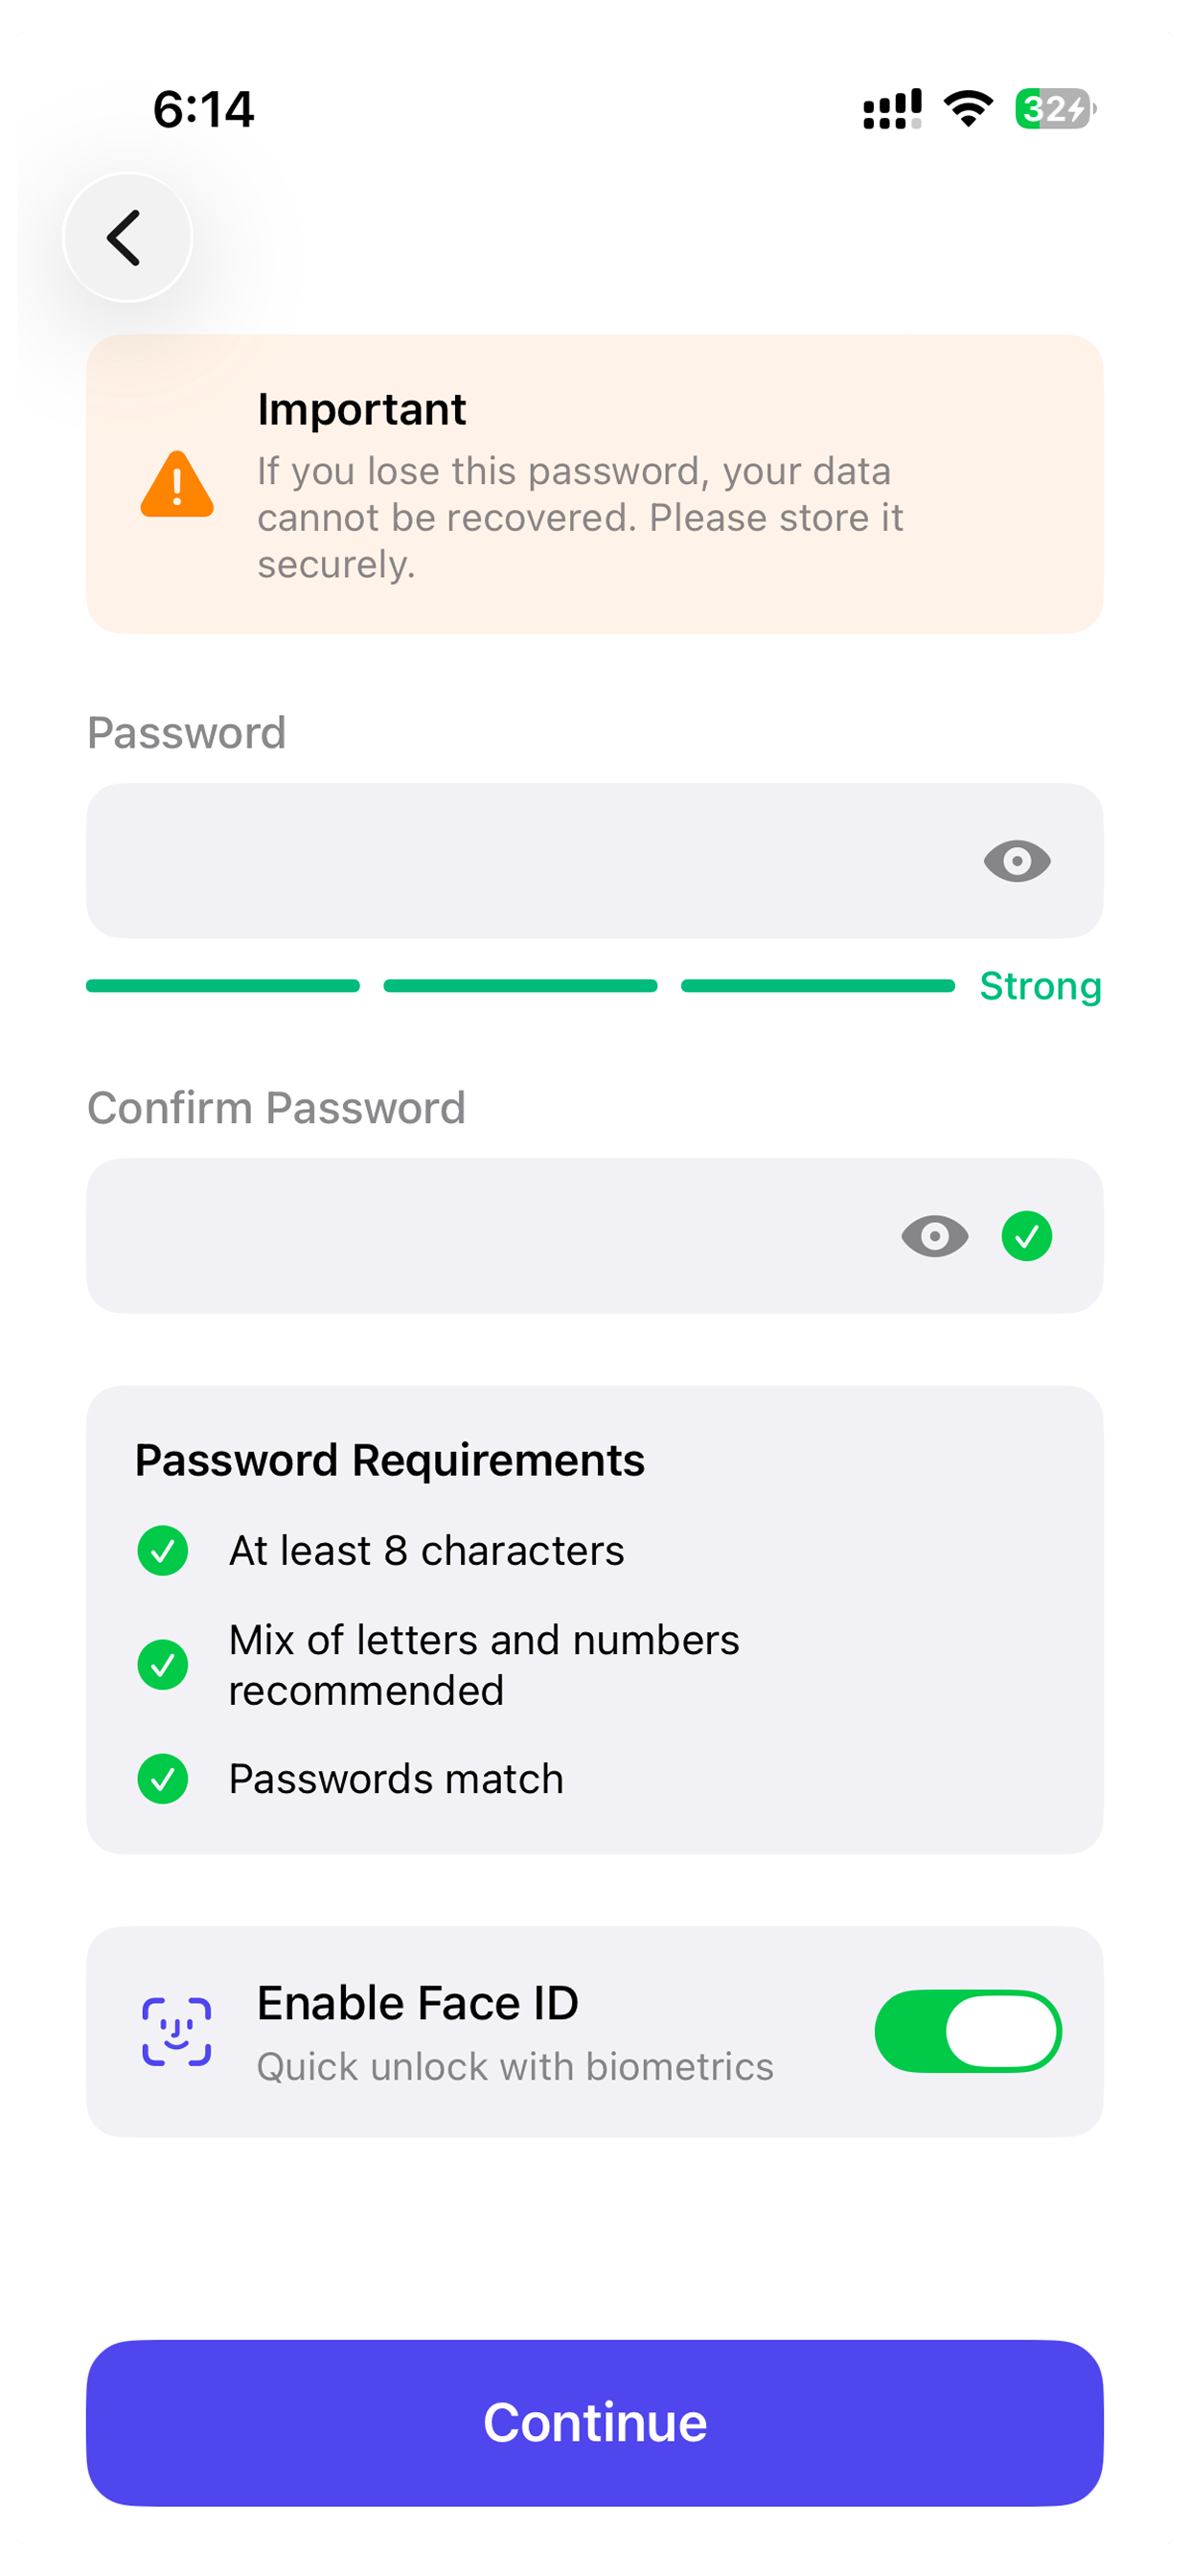
- Create Master Password — Set a strong password (min 8 characters). This is the only password you need to remember — there is no recovery option.
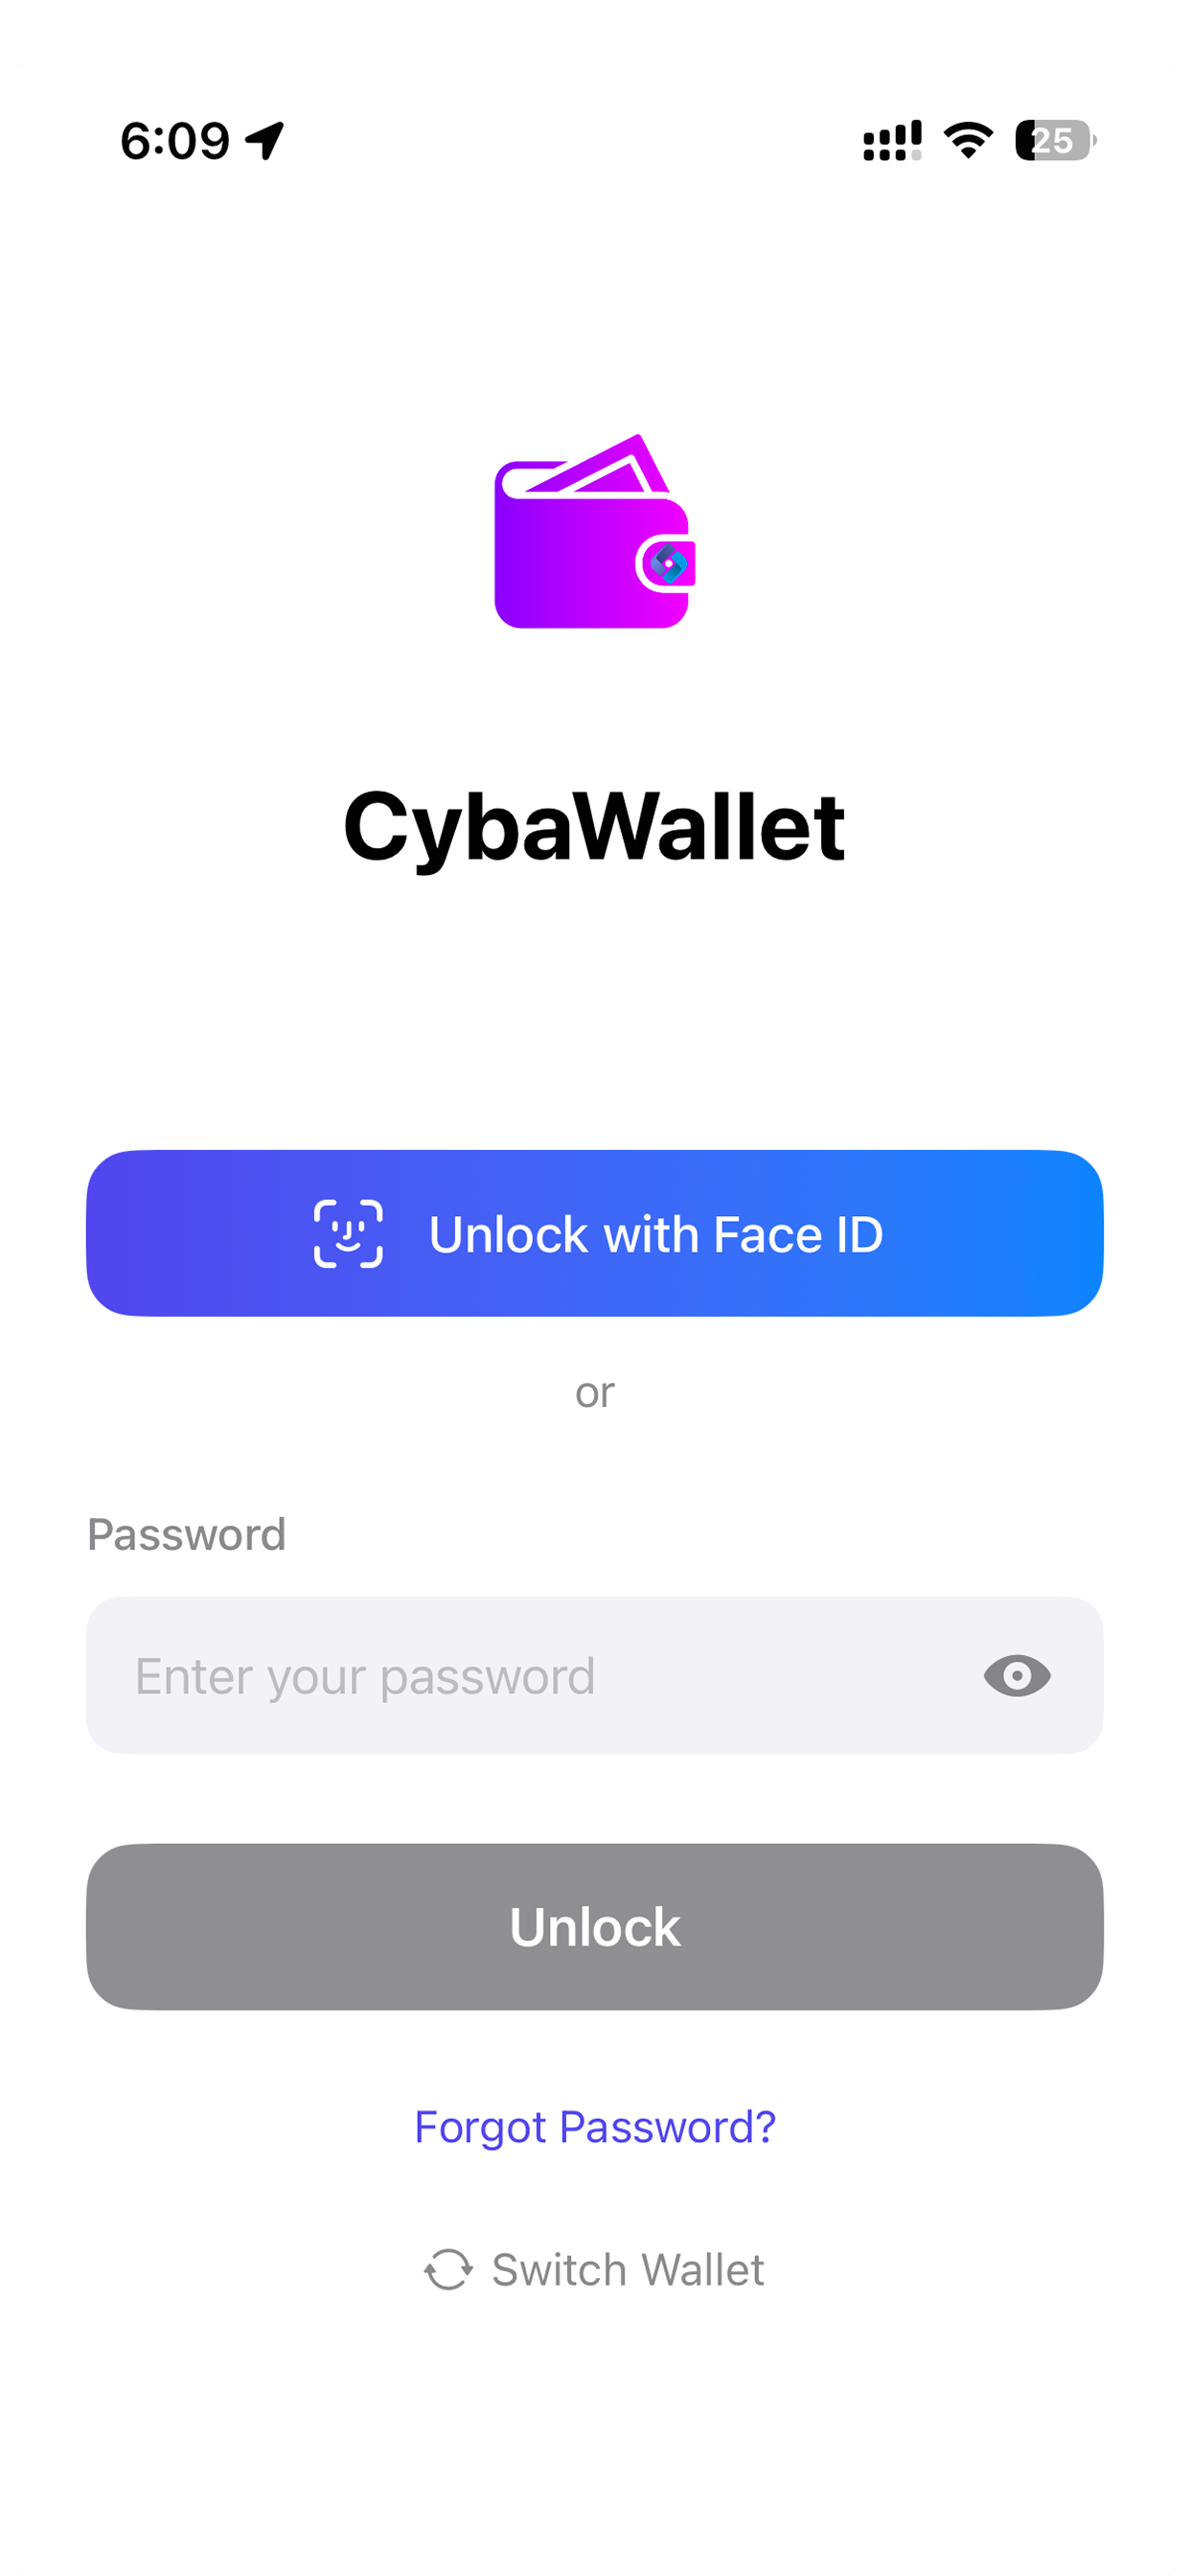
- Enable Biometrics (optional) — Turn on Face ID or Touch ID for quick unlock.
Multiple Wallets
You can create and manage multiple wallets, each with its own password:
- Create New Wallet — Start fresh with a new encrypted database.
- Open Existing Wallet — Select a
.cwalor.dbwallet file from any location. - Switch Wallet — Go to Settings → Switch Wallet to change wallets.
Cards
Manage your credit, debit, and prepaid cards from the Cards tab.
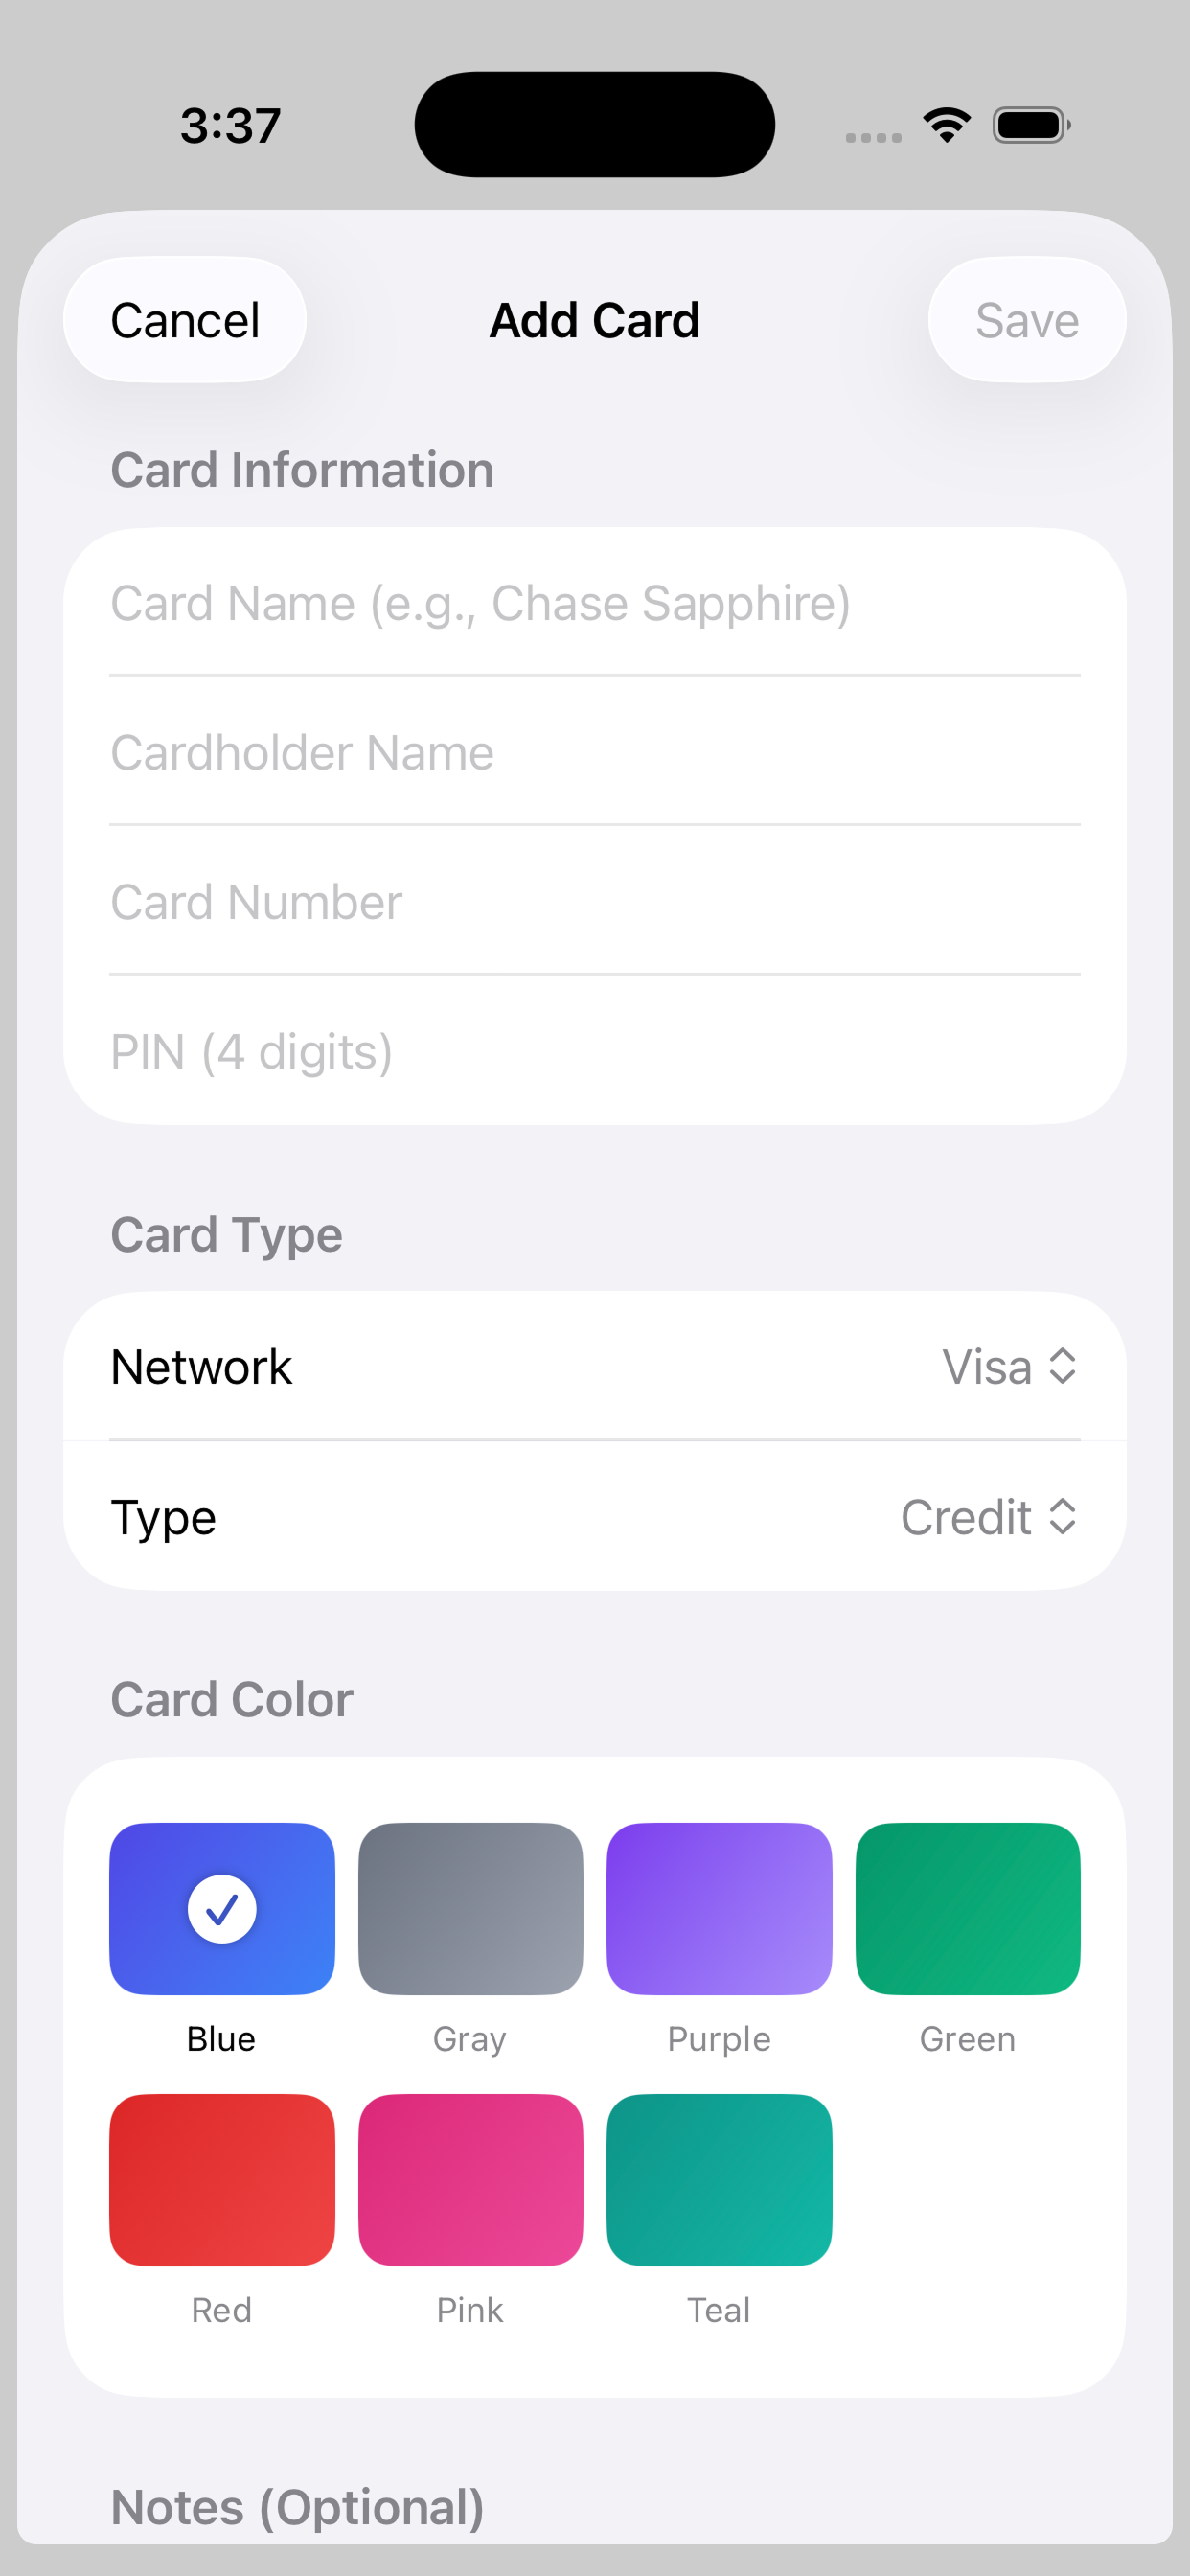
Adding a Card
- Tap + on the Cards tab.
- Fill in: name, cardholder, card number, CVV, expiry, PIN.
- Choose a card network (Visa, Mastercard, Amex, Discover), type (Credit, Debit, Prepaid), and color.
- Optionally assign a category.
- Tap Save.
Scanning a Card
Tap the camera icon next to the card number field to scan a physical card. The app uses OCR via the device camera to auto-detect the card number and expiry date.
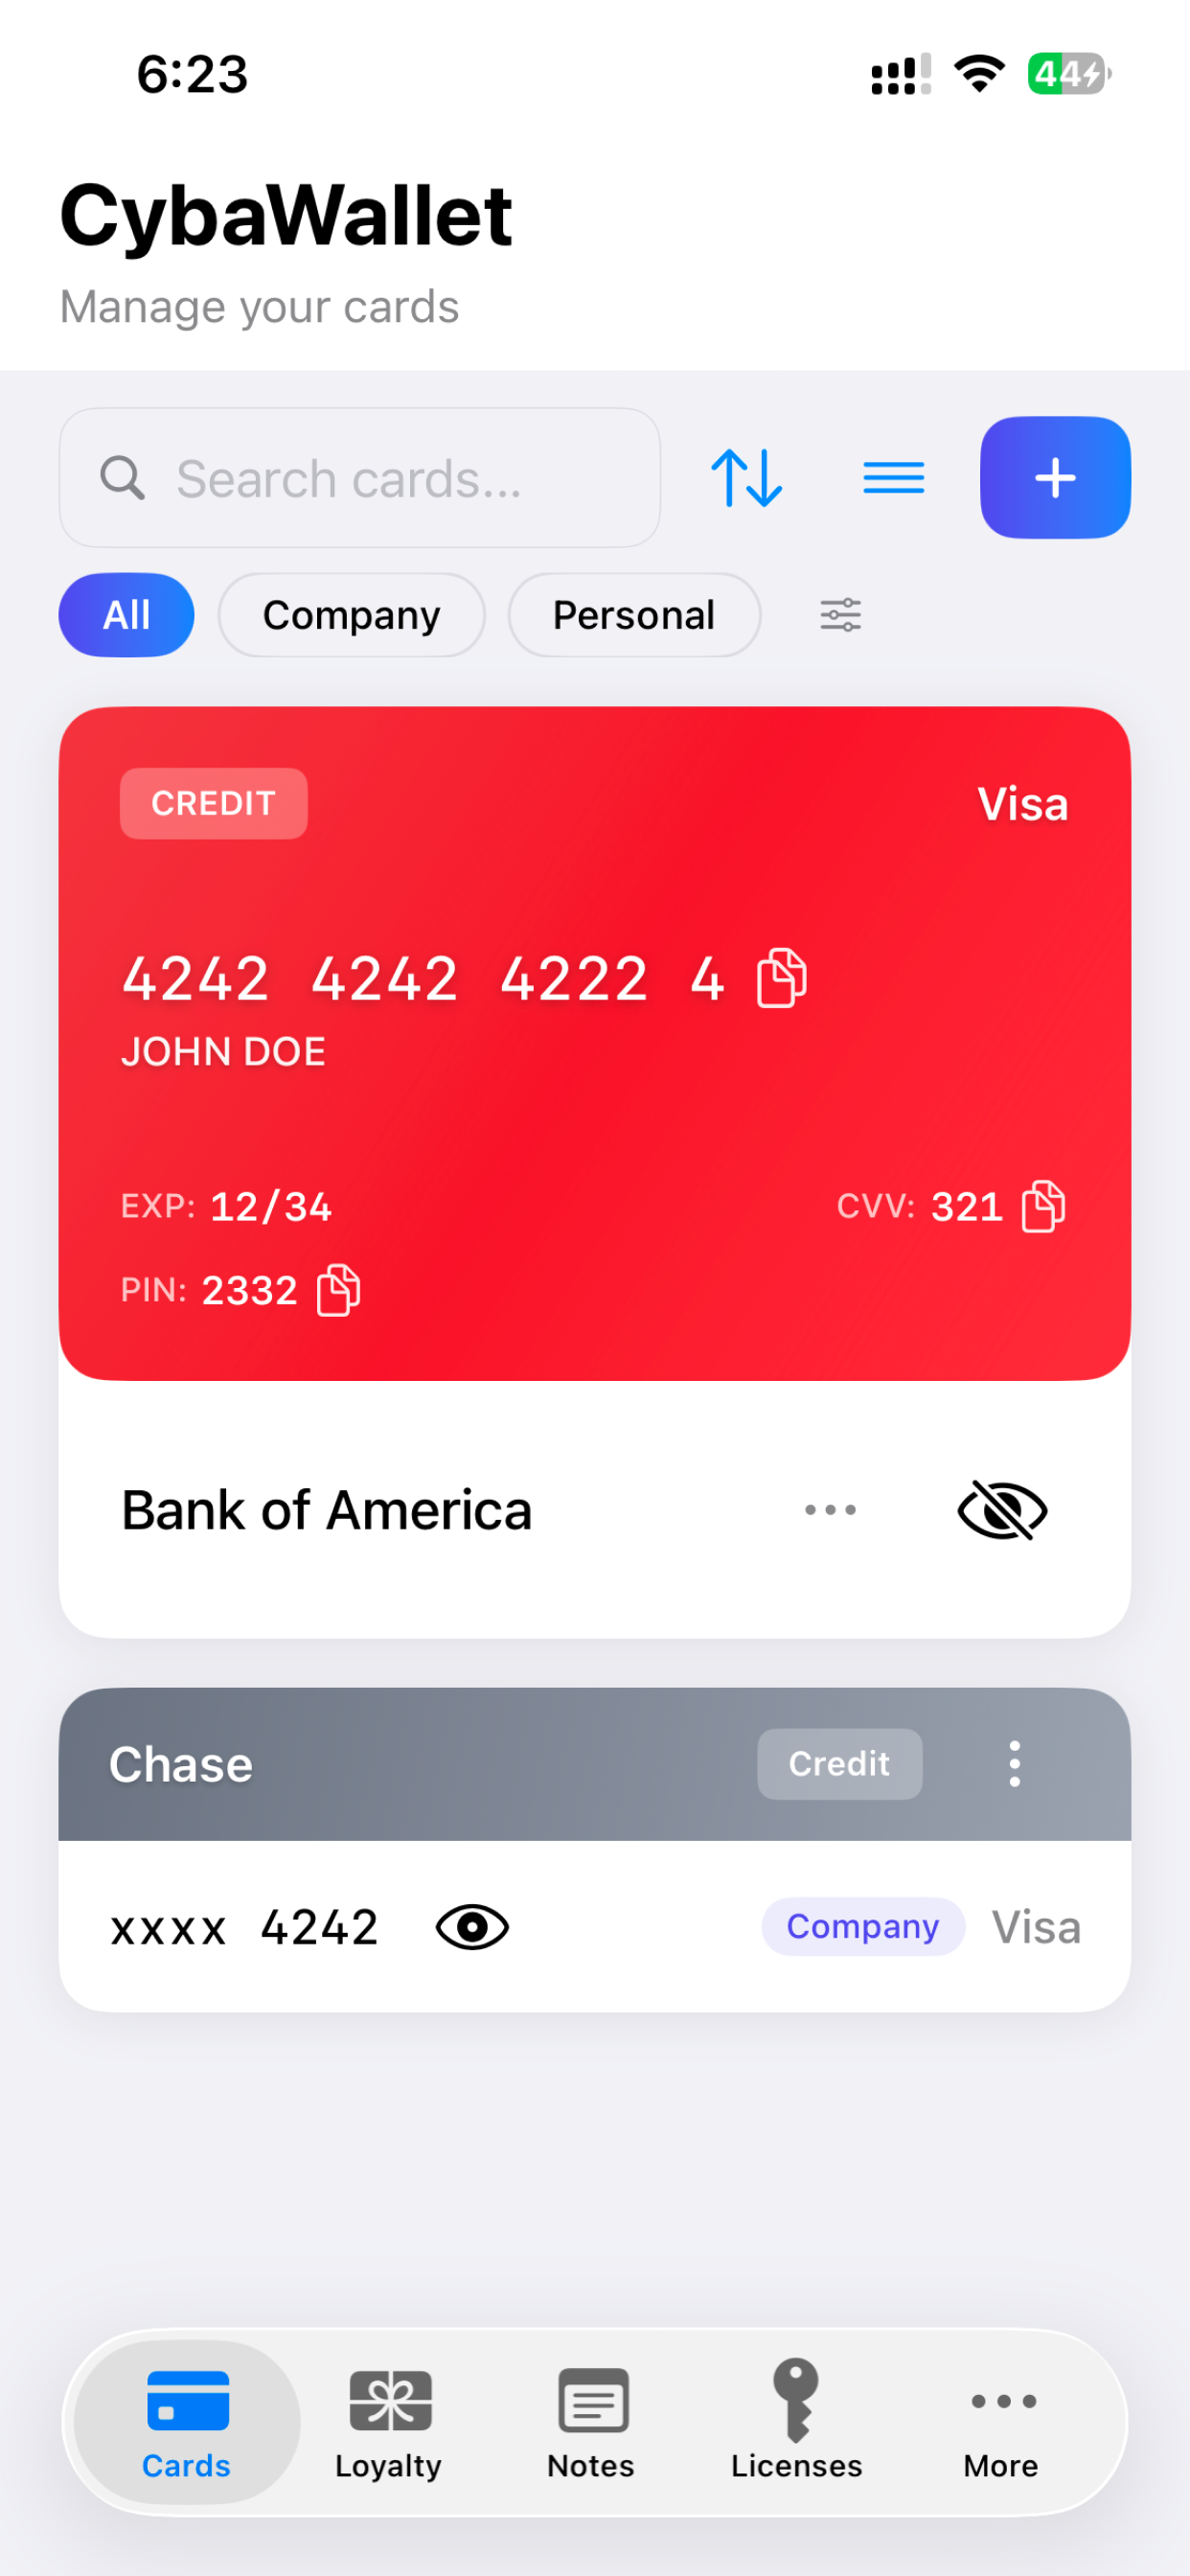
Organizing Cards
- Search — Filter by name, cardholder, or number.
- Categories — Use chip filters. Tap Manage to create, edit, or delete categories.
- Sort — Order by Custom, Type, Network, or Color.
- Reorder — In Custom Order mode, drag and drop cards to rearrange.
Copying Card Details
With the privacy toggle (eye icon) set to visible, tap the copy button next to any field to copy it to the clipboard. The clipboard auto-clears after your configured timeout.
Loyalty Cards
Store loyalty and membership cards with scannable barcodes and QR codes.
Adding a Loyalty Card
- Tap + on the Loyalty tab.
- Enter the program name and card/membership number.
- Choose the code type: Barcode or QR Code.
- Optionally assign a category and add notes.
- Tap Save.
Scanning a Barcode or QR Code
Tap the camera icon on the card number field, then choose Scan Barcode or Scan QR Code. Point your camera at the code — it auto-detects and fills in the number.
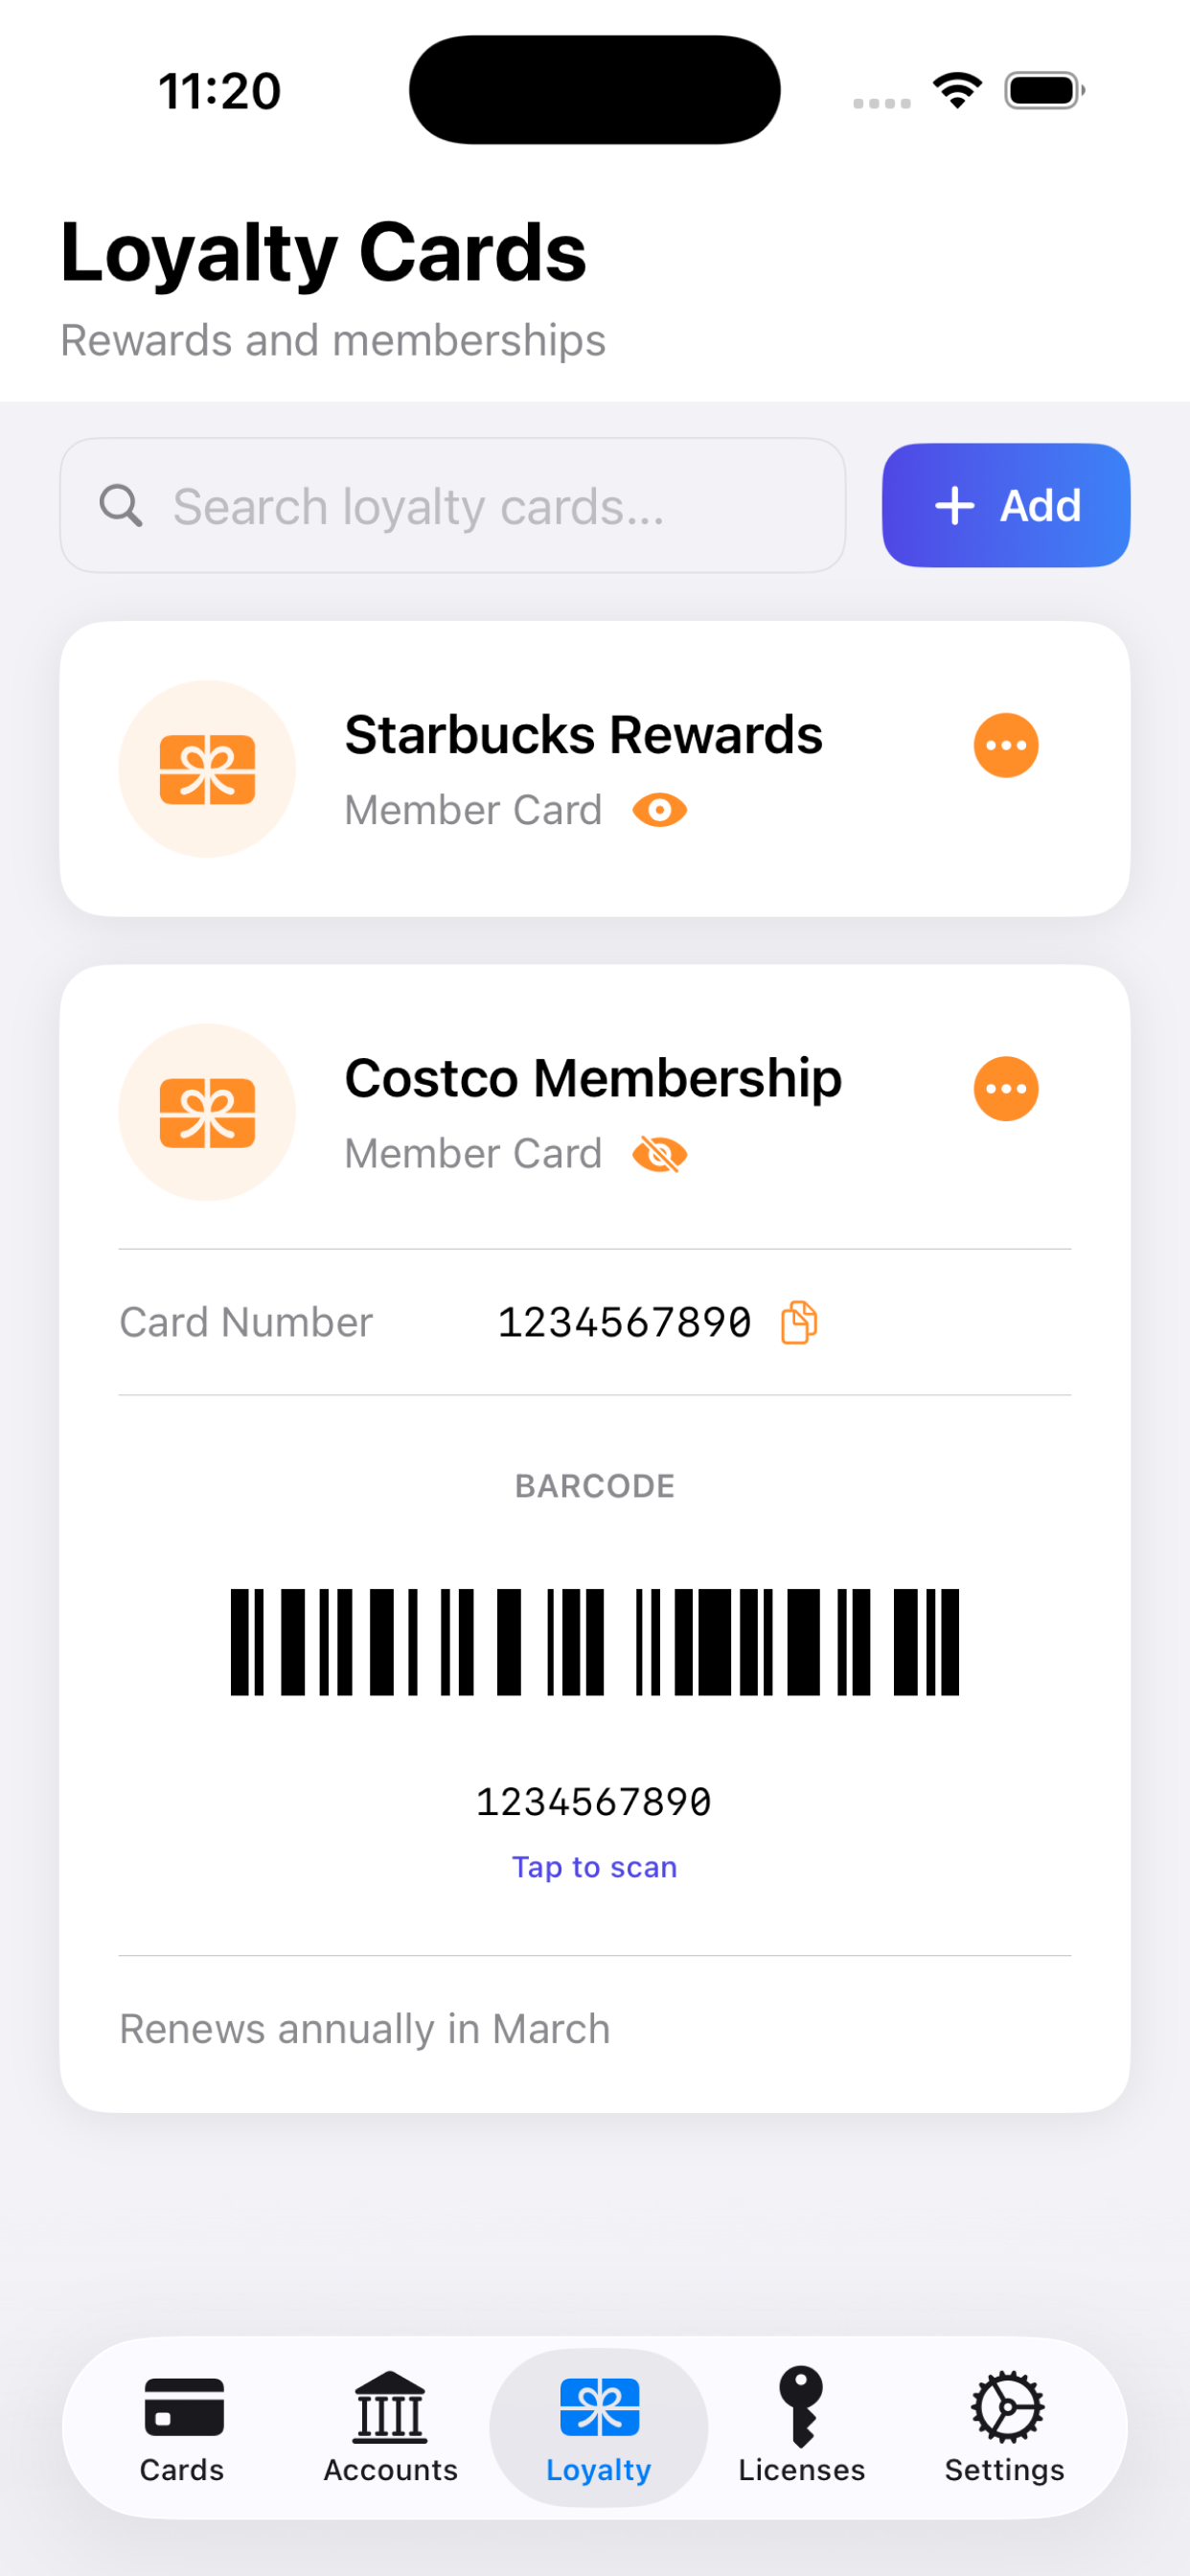
Viewing Barcodes
Tap a loyalty card to expand it and view the barcode or QR code full-size — ready to scan at the register.
Importing Shared Cards
CybaWallet can open .cybawallet files shared via AirDrop, email, or other apps. A confirmation sheet shows the card details before importing.
Notes
Create encrypted notes with markdown formatting and optional PIN protection.
Creating a Note
- Tap + on the Notes tab.
- Enter a title and write your content.
- Use the formatting toolbar for markdown: bold, italic, headings, lists, links, code blocks.
- Toggle between Edit and Preview to see rendered markdown.
- Add tags for organization.
- Tap Save.
PIN-Protecting a Note
In the note editor, enable PIN Protection and set a 4–6 digit PIN with an optional hint. Locked notes display a lock icon and require the PIN to view.
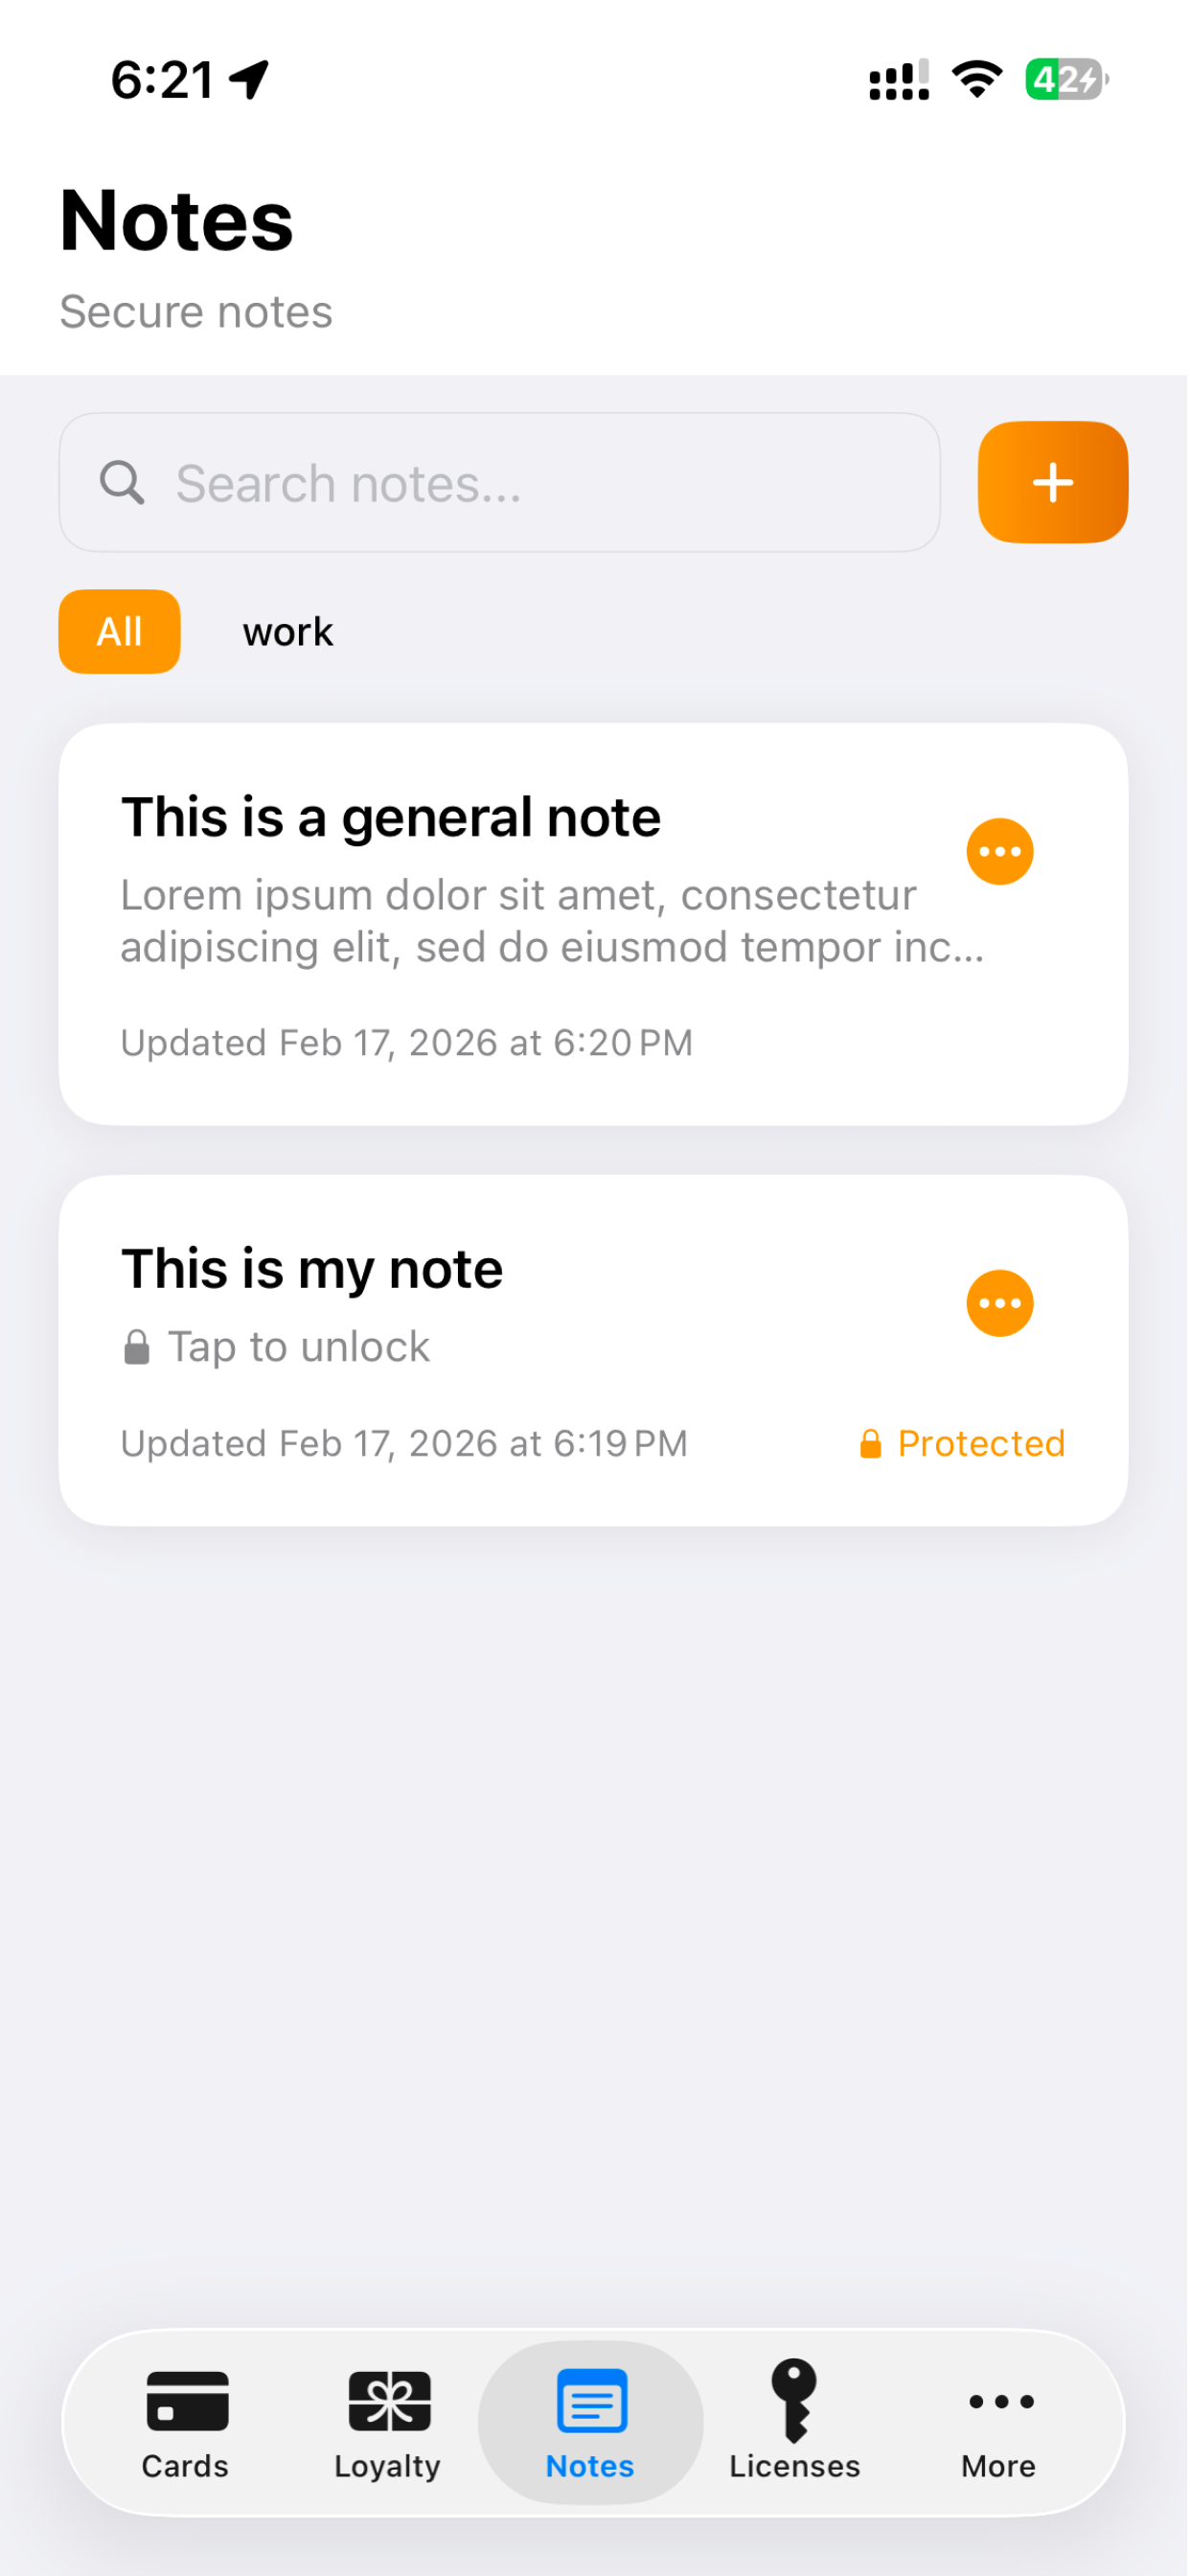
Filtering by Tags
Use the tag chips at the top of the notes list to filter by tag. Tap All to clear the filter.
Licenses
Store software license keys and subscription details.
Adding a License
- Go to the Licenses tab and tap +.
- Enter the product name, license key, issuer, and version.
- Optionally set an expiry date and add a URL or notes.
- Tap Save.
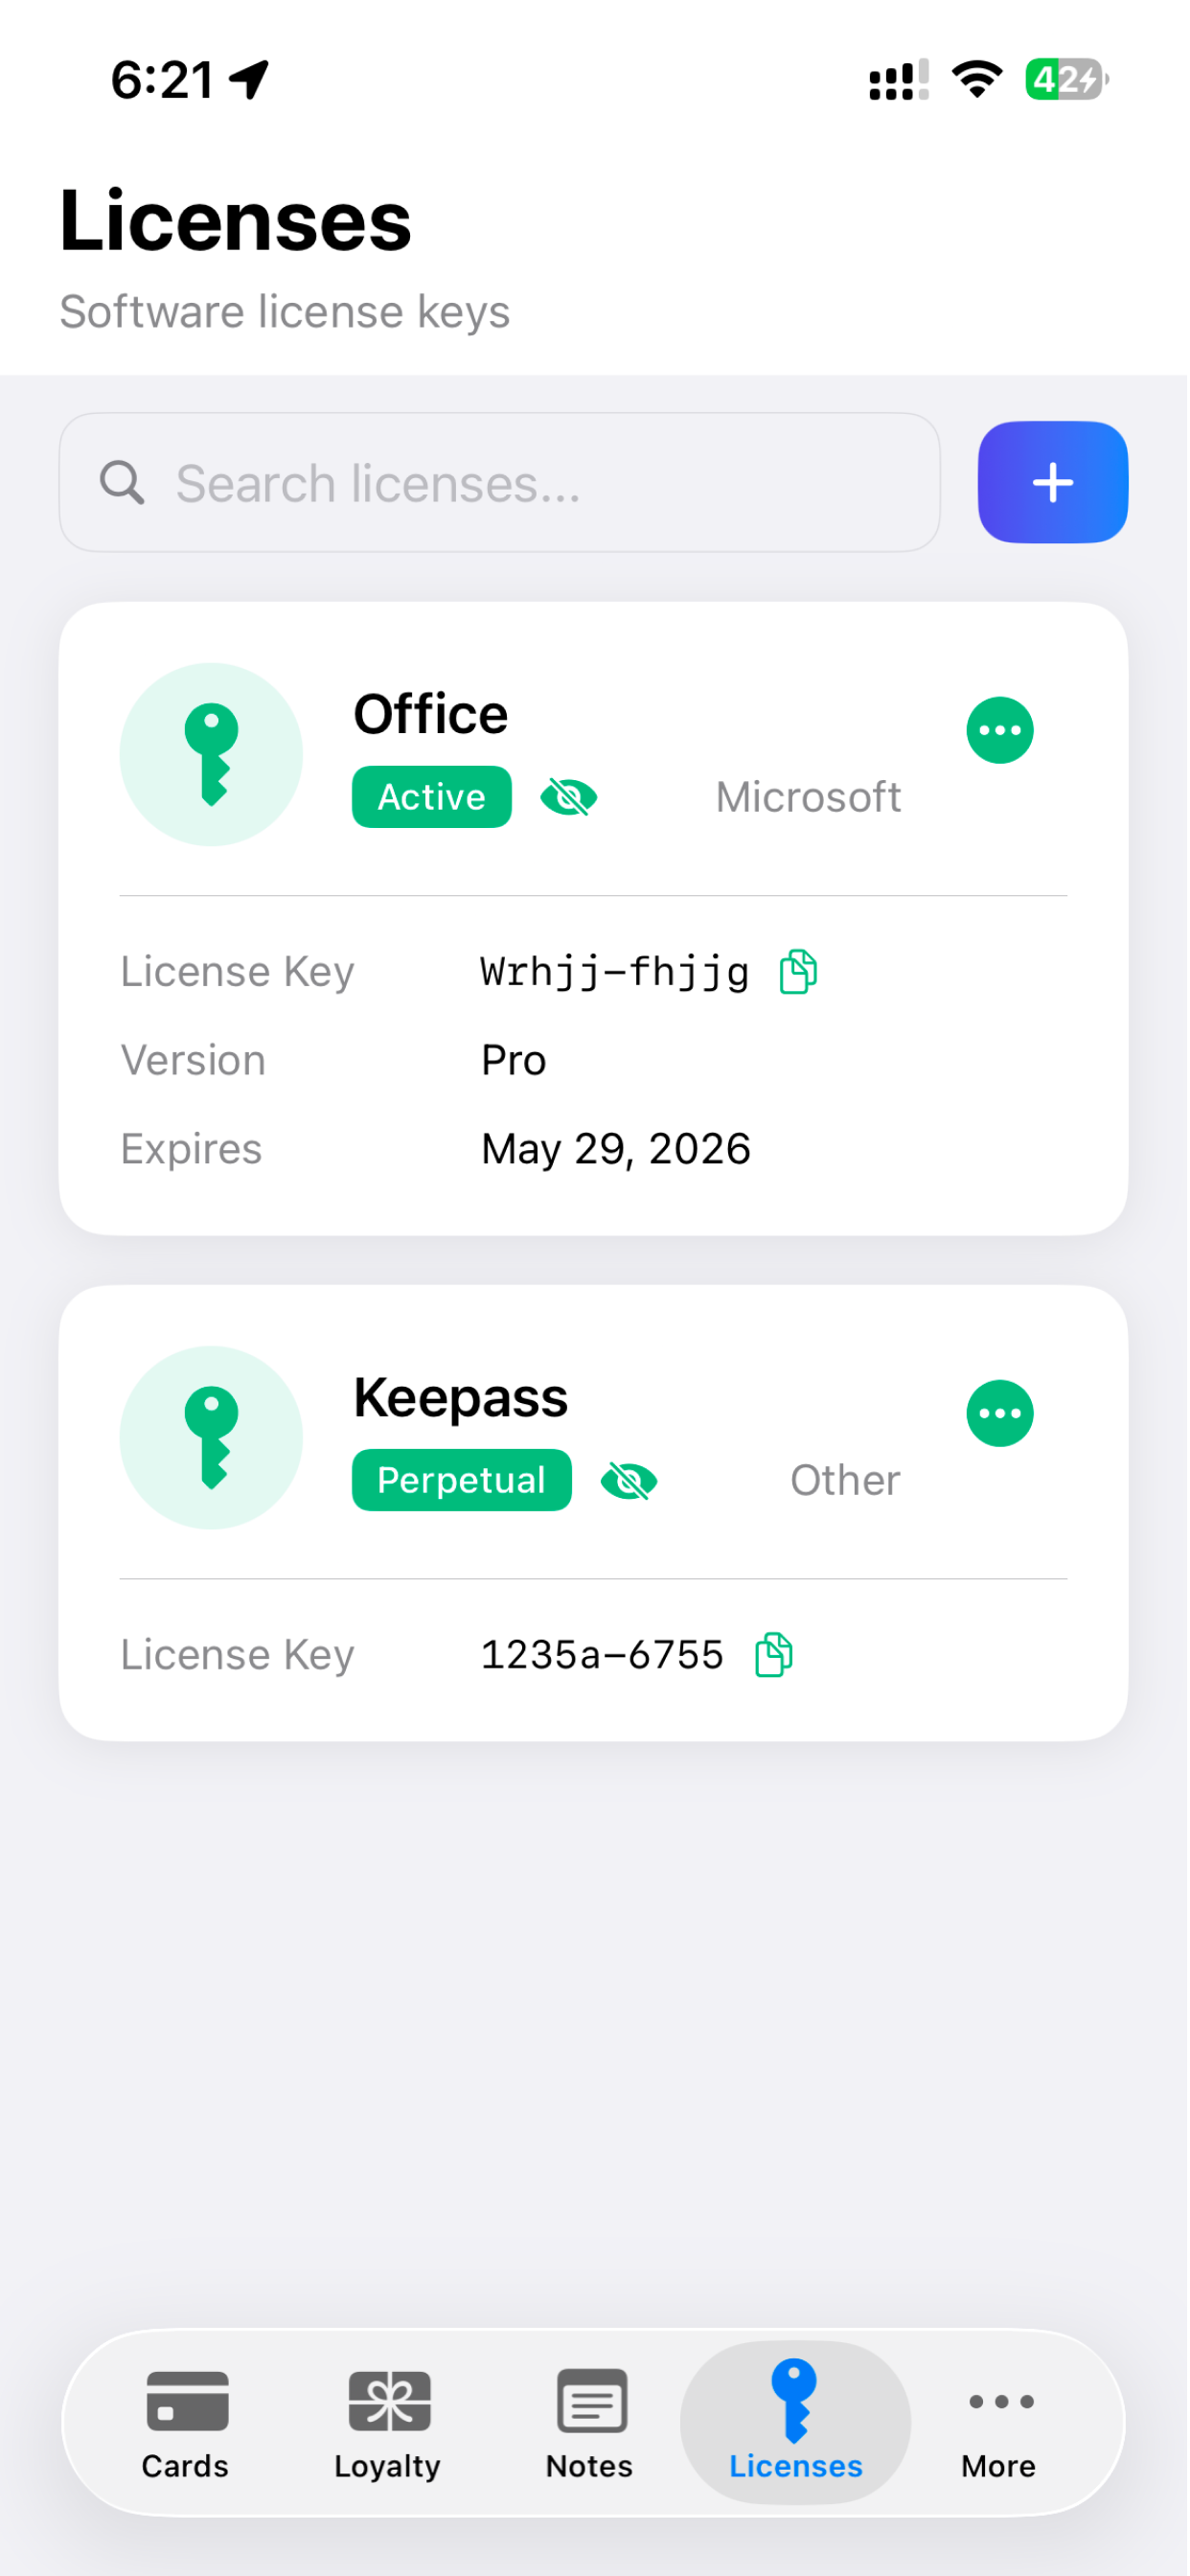
Copying License Keys
With privacy mode off (eye icon), tap the copy button to copy a license key to the clipboard.
Bank Accounts
Store bank account details securely.
Adding an Account
- Go to More → Bank Accounts and tap +.
- Enter the account name, account number, routing number, account type, and optional balance/notes.
- Tap Save.

With privacy mode off, copy account numbers and routing numbers with a single tap.
Contacts
Store encrypted personal and professional contacts — lawyers, accountants, emergency contacts, and more.
Adding a Contact
- Go to More → Contacts and tap +.
- Fill in details across these sections:
- Contact Information — Full name (required), role (e.g. Lawyer, Accountant), organisation.
- Phone & Email — Primary & secondary phone, email, website.
- Address — Street address details.
- Tags — Comma-separated tags for filtering.
- Notes — Free-text notes.
- Professional Details — Reference/case number, portal URL, portal username.
- Optionally enable Allow Emergency Access.
- Tap Save.
Filtering Contacts
- Search — Filter by name, organisation, role, email, or tags.
- Tags — Tap a tag chip to filter. Tap All to clear.
Secure Media
Store photos, videos, and PDFs in encrypted albums with optional PIN protection.
Creating an Album
- Go to More → Secure Media and tap +.
- Enter an album name and optionally set a PIN.
- Tap Save.
Adding Media
Open an album, then use the + menu:
- Add Photo / Video — Pick from Photos library, Files app, or capture with the camera.
- Upload Multiple Files — Select up to 50 photos and videos at once.
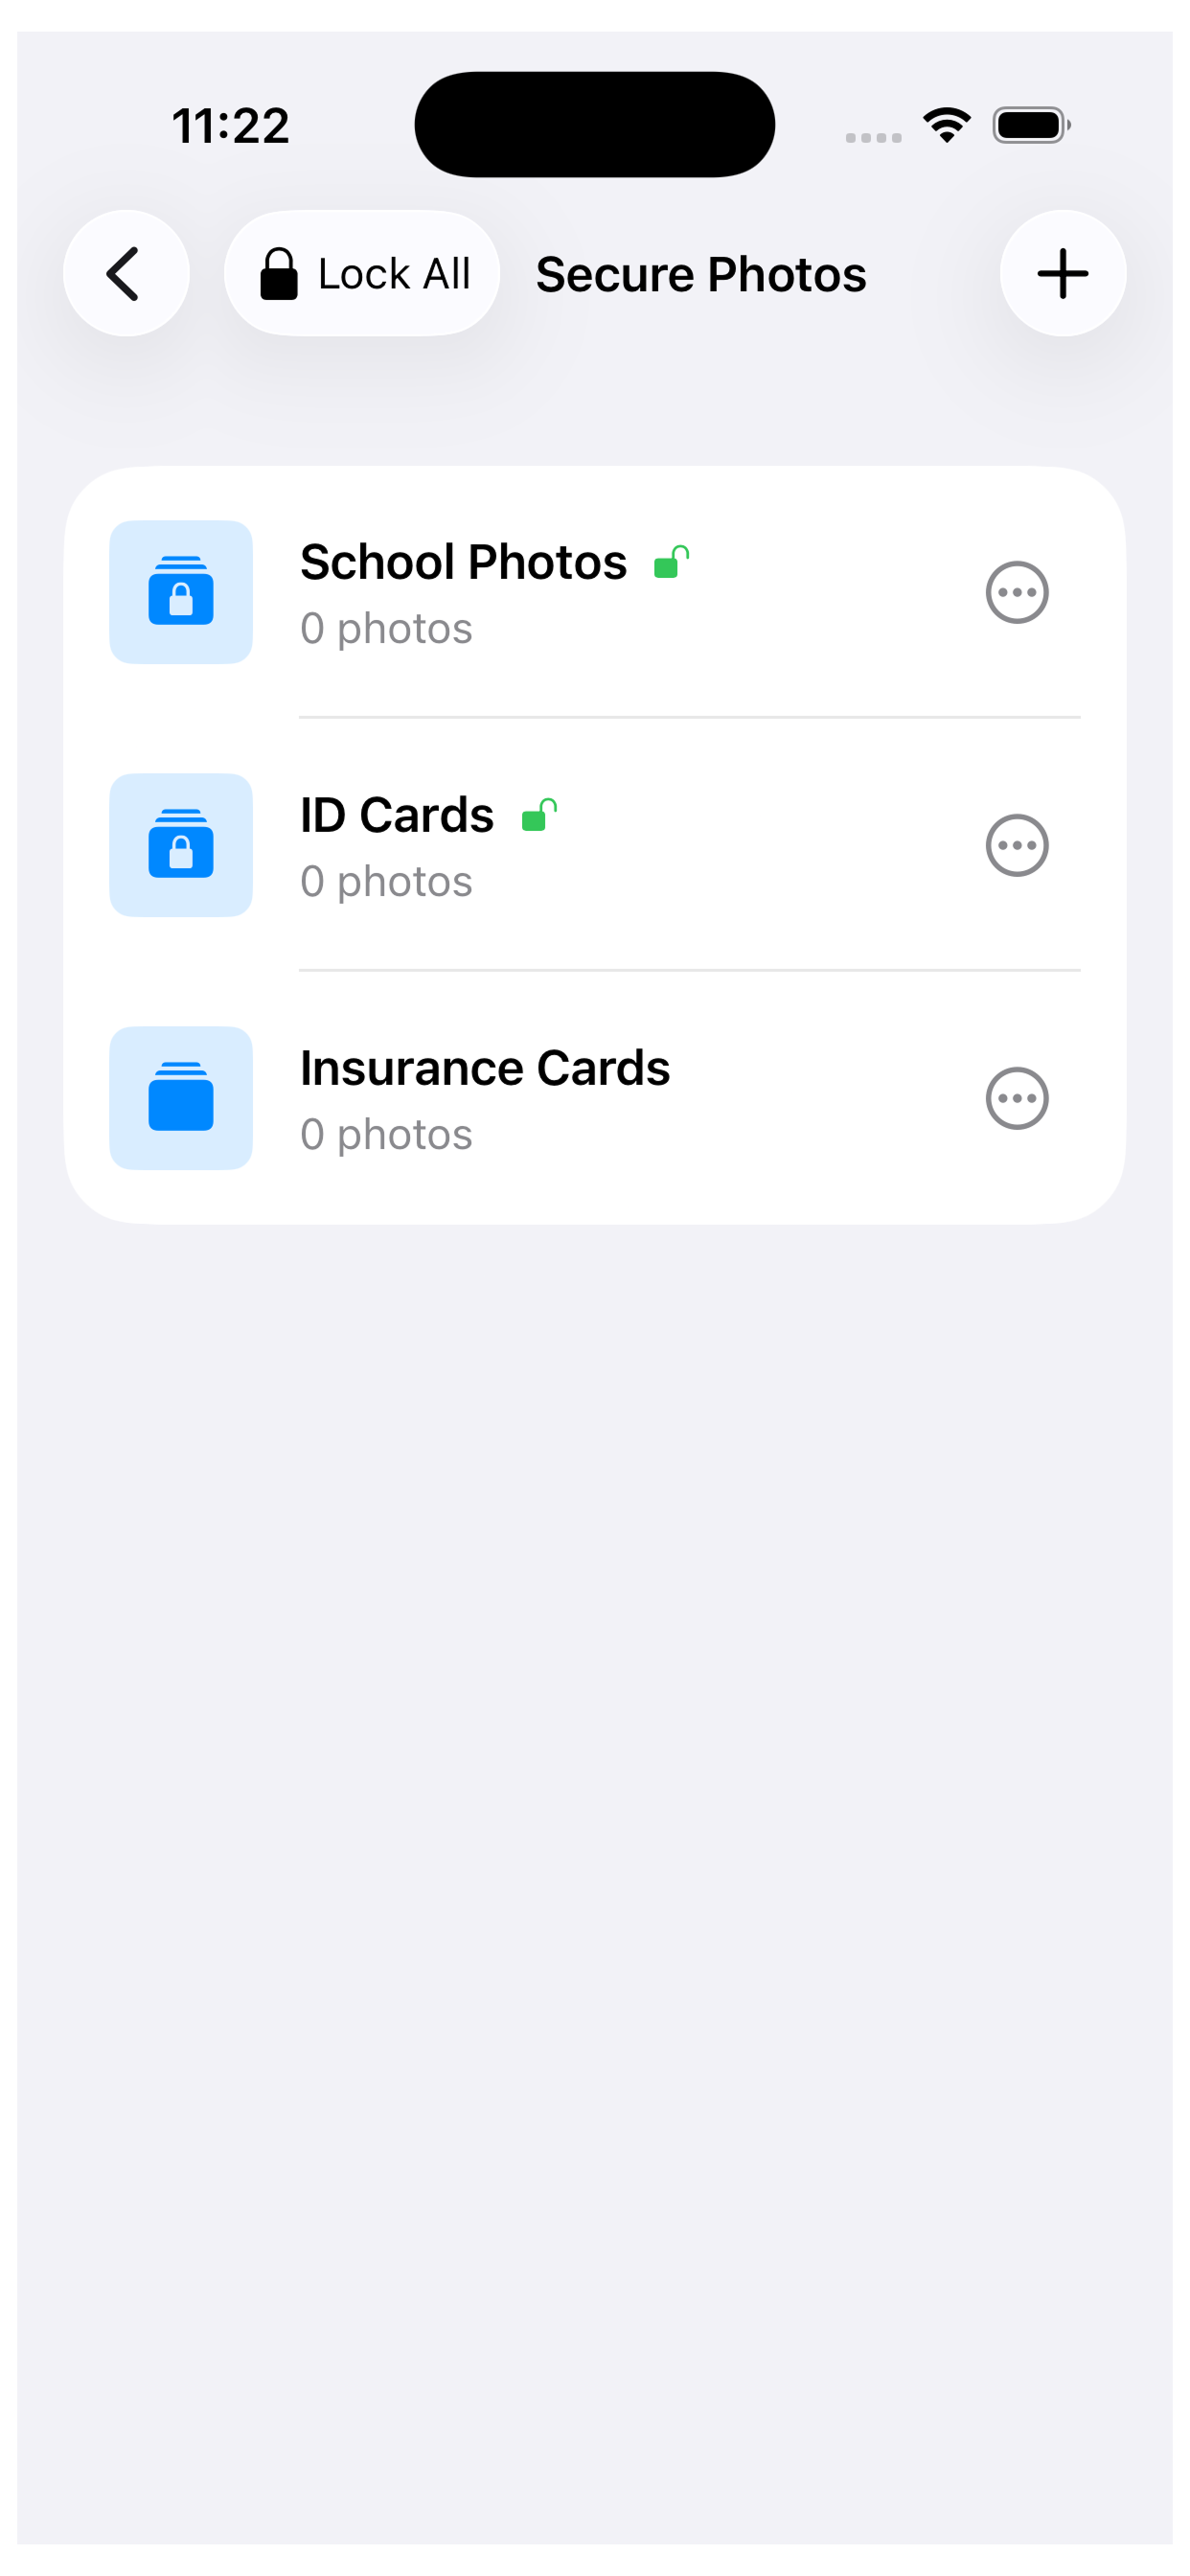
Album PIN Protection
PIN-protected albums display a lock icon. Tap Lock All in the albums toolbar to re-lock all unlocked albums at once.
Viewing Media
- Photos — Full-screen view with pinch-to-zoom and pan.
- Videos — Secure in-memory playback. Decrypted content is cleared from memory when you leave the view.
Privacy & Security
Privacy Toggle
The eye icon in the toolbar controls sensitive data visibility:
- Hidden (default) — Card numbers, PINs, CVVs, account numbers, routing numbers, and license keys are masked.
- Visible — Full values shown with copy-to-clipboard buttons.
Auto-Lock
The app locks automatically after a configurable timeout when moved to the background. Set in Settings → Auto-Lock Timeout (Immediate / 1 min / 5 min / 15 min / Never).
Clipboard Protection
Copied sensitive data is automatically cleared from the clipboard after your chosen timeout (30 s, 1 min, or 2 min). Configure in Settings → Clear Clipboard After.
Encryption
All data is encrypted at rest using AES-256 encryption via SQLCipher. Media files use AES-256-GCM. Your master password never leaves the device.
Offline Operation
CybaWallet makes zero network requests. No analytics, no tracking. Cloud sync only happens if you choose a cloud folder for wallet storage.
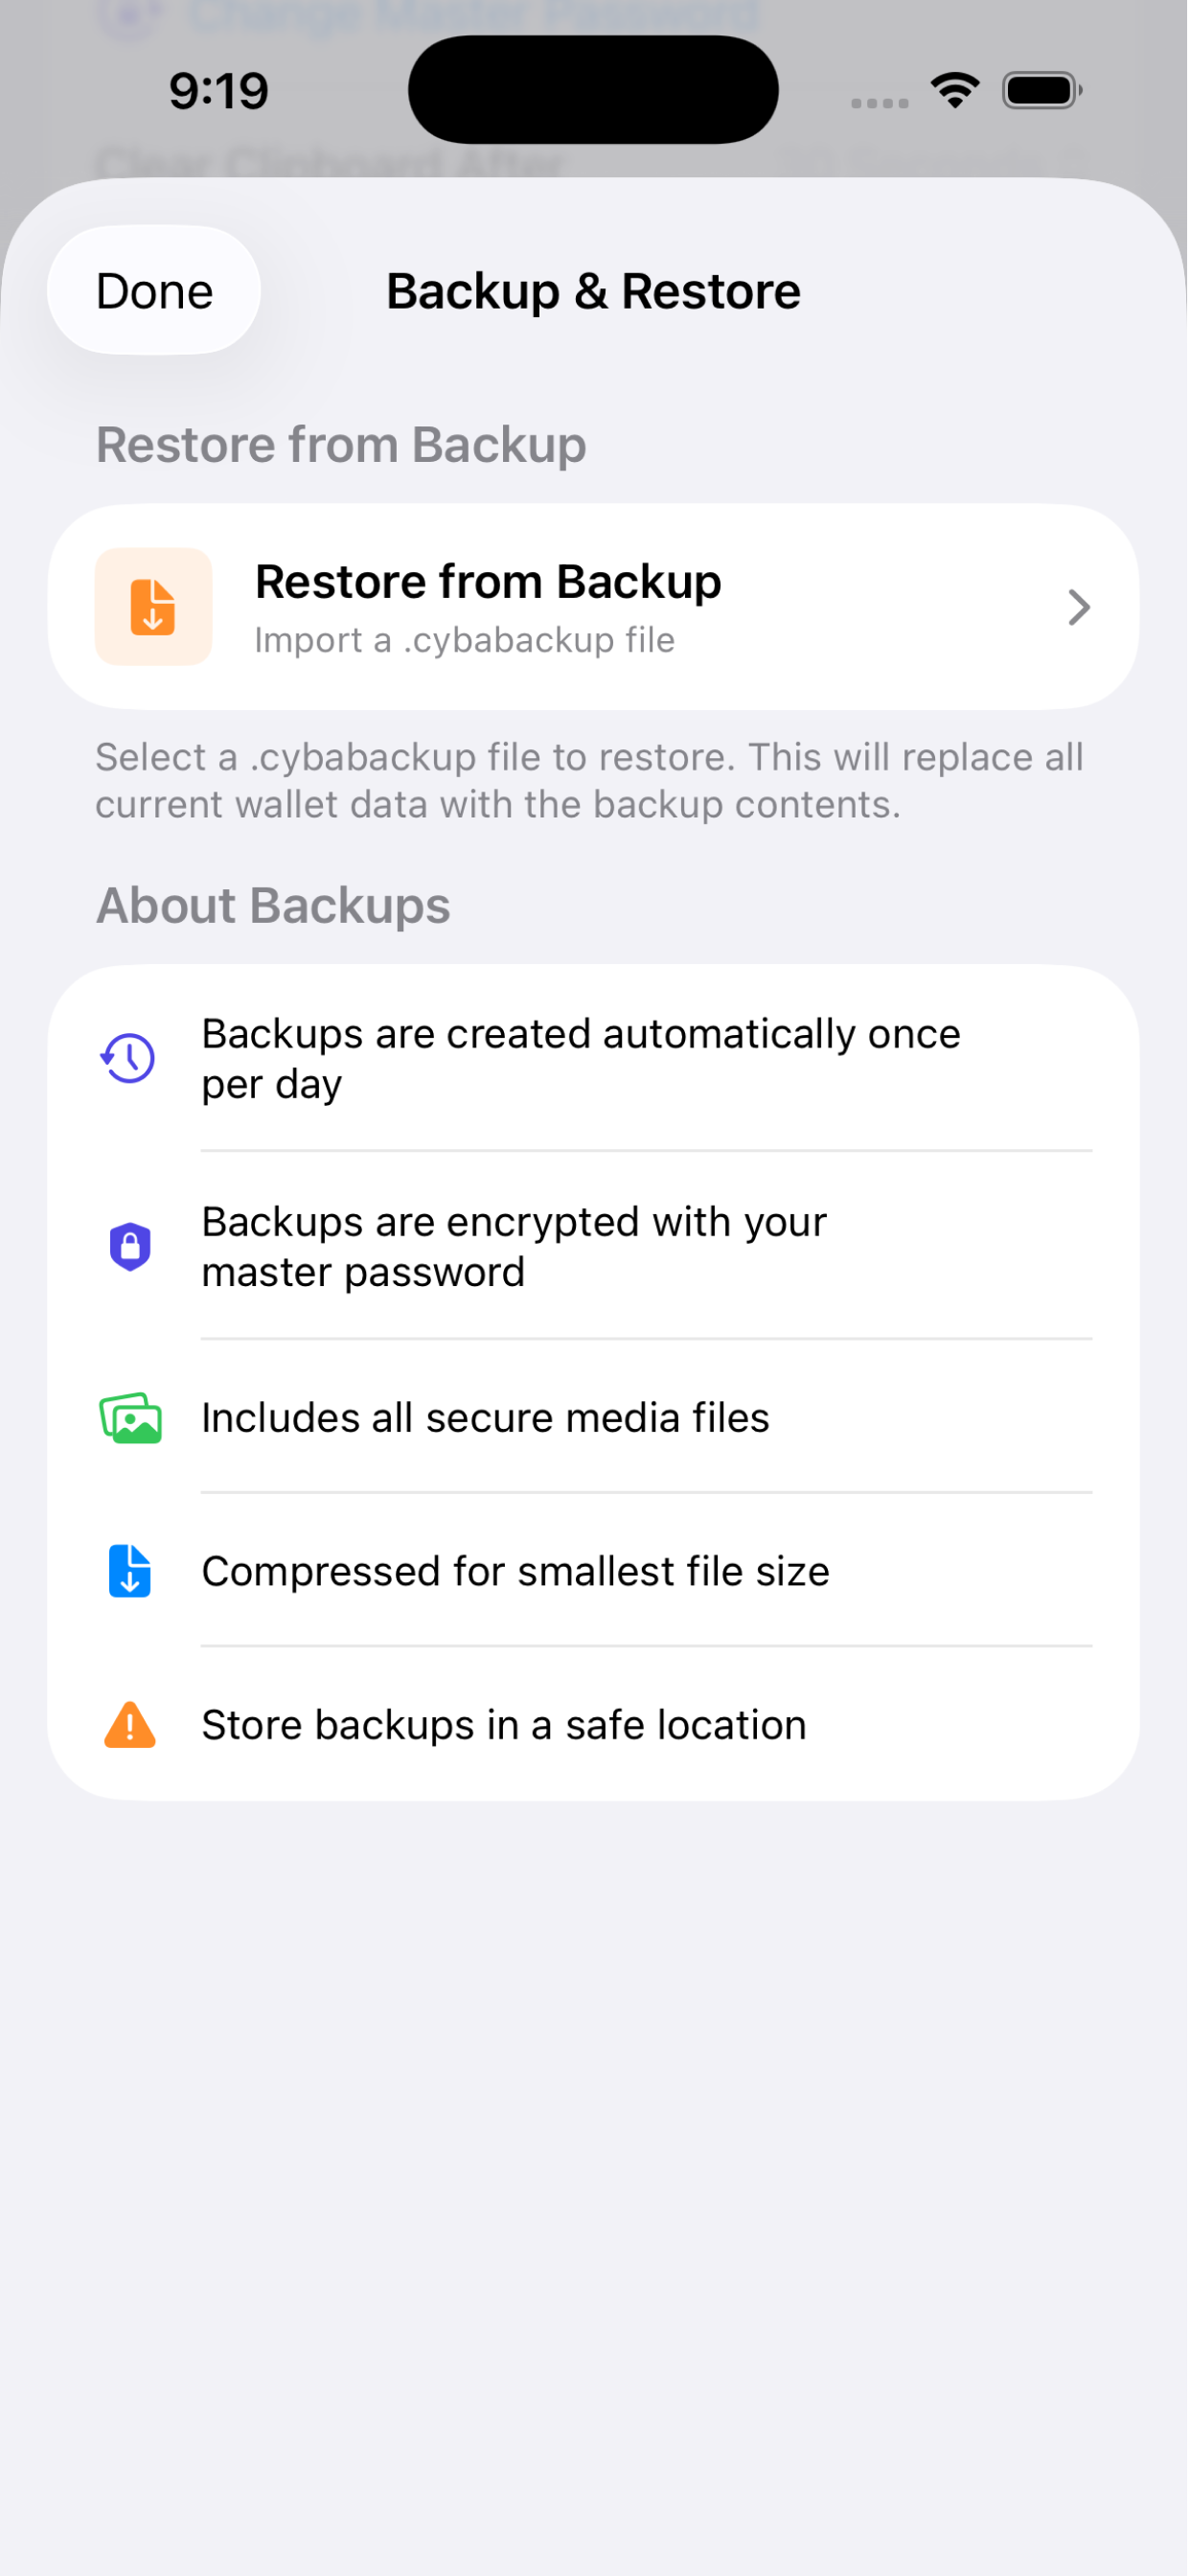
Backup & Restore
Automatic Backups
Daily encrypted backups are created automatically as .cybabackup files. Configure how many days to keep in Settings → Daily Backups to Keep (1–5 days).
Restoring from Backup
- Go to Settings → Backup & Restore → Restore from Backup.
- Select a
.cybabackupfile. - Review the backup details (date, size, app version).
- Enter the original master password used when the backup was created.
- Confirm — this replaces all current data.
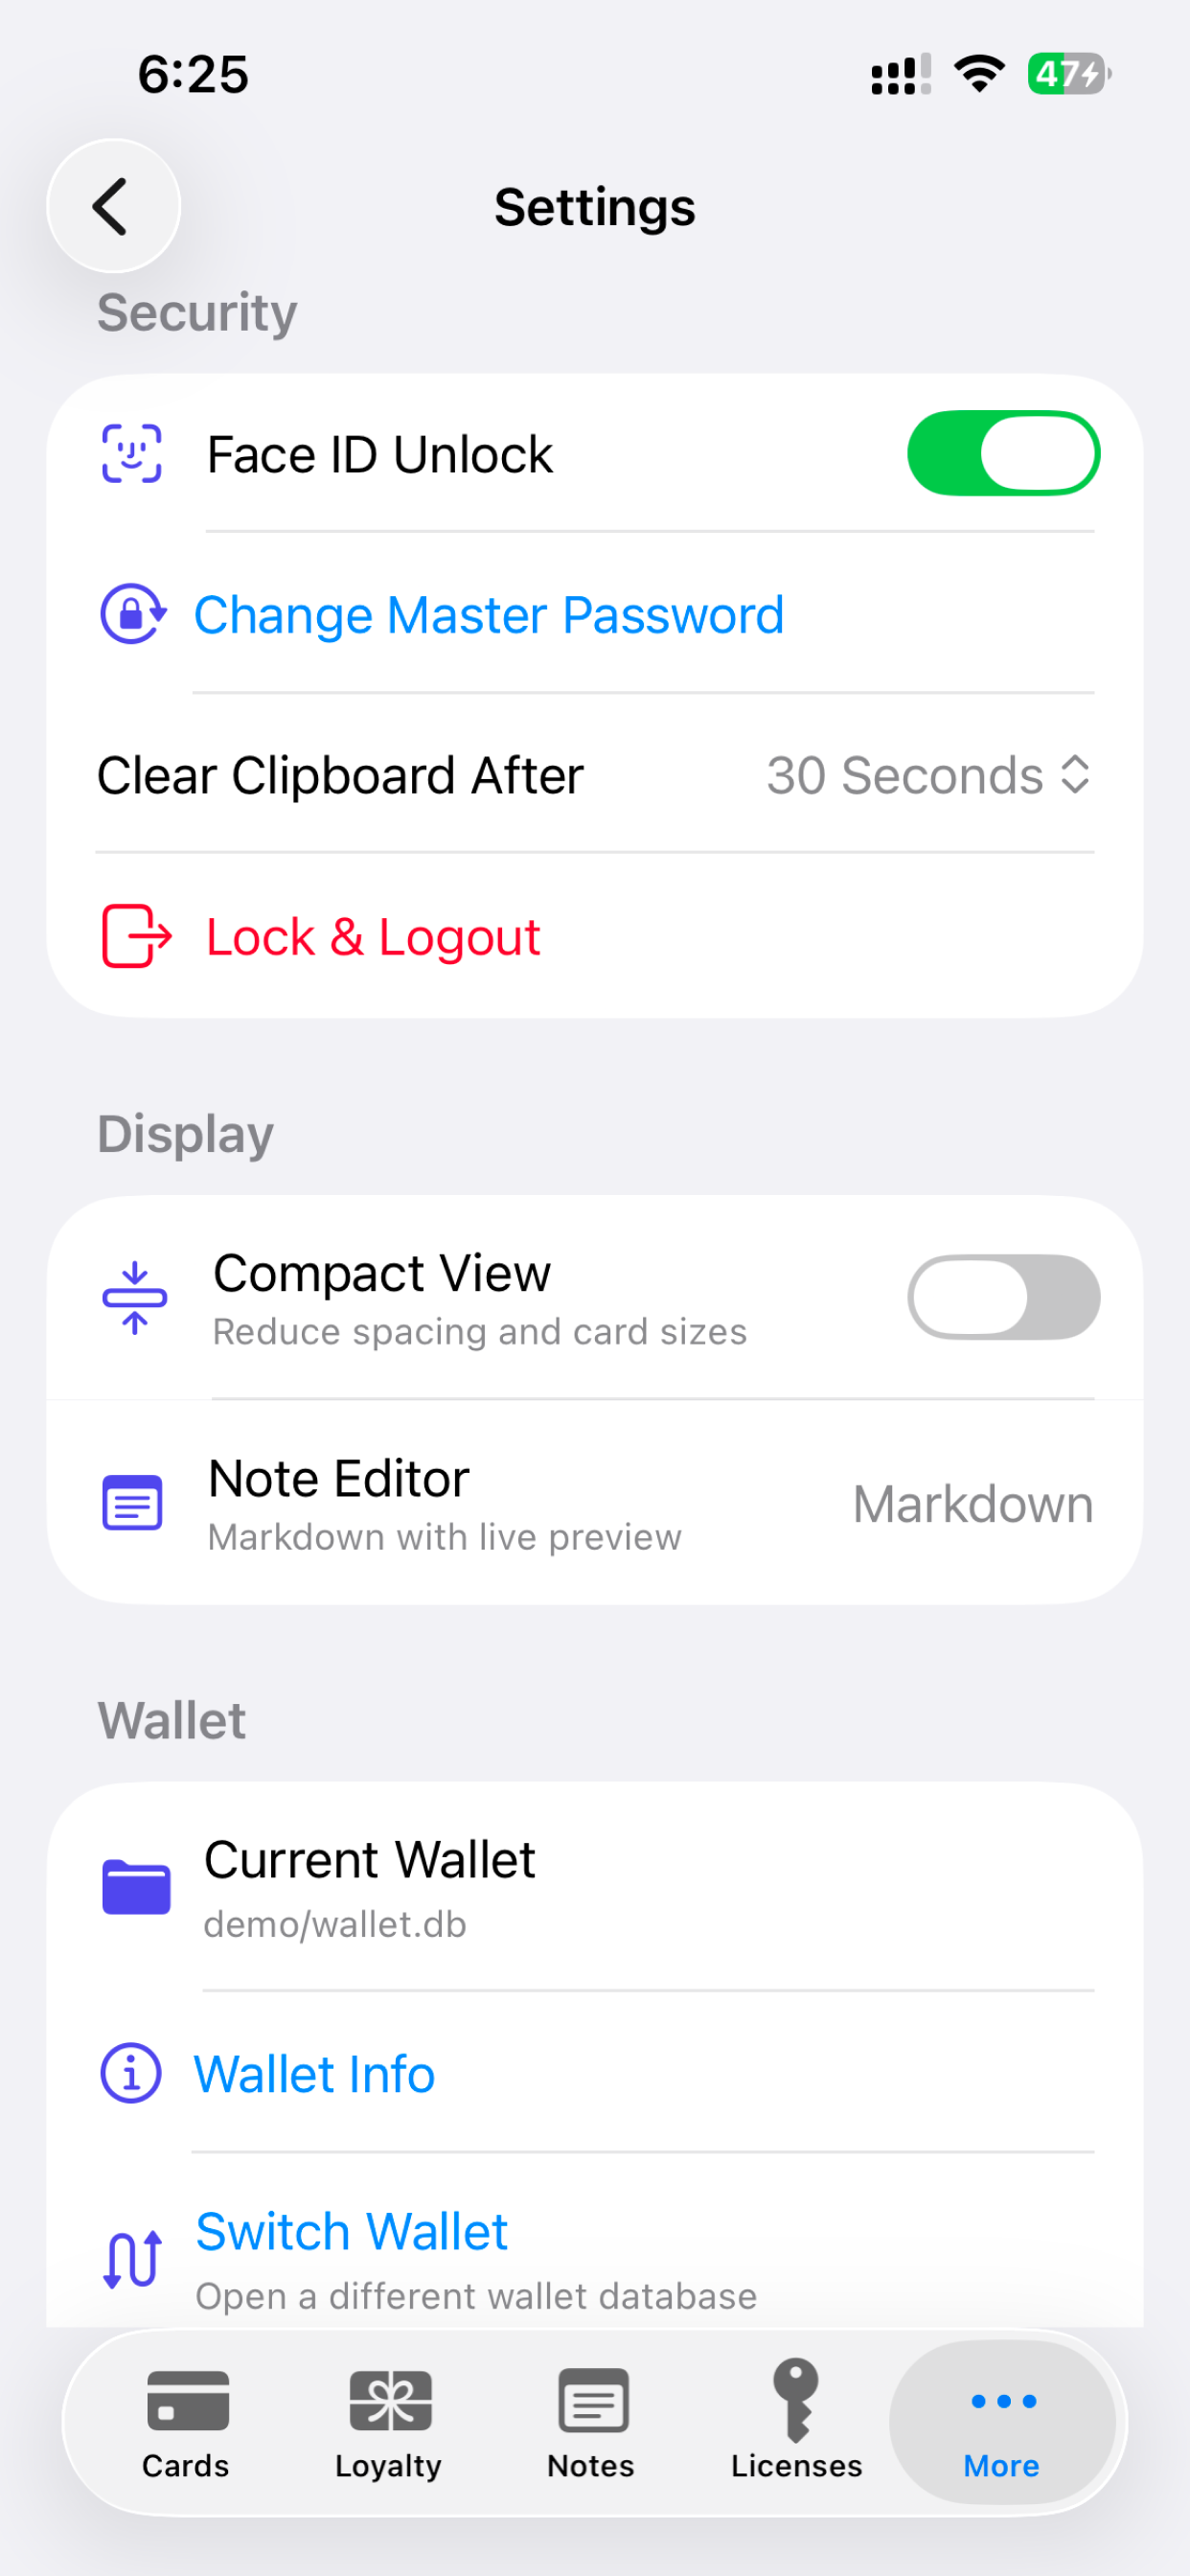
Settings
Access Settings from More → Settings.
Quick Tips
- Swipe left on any list item to delete it.
- Drag and drop cards to reorder them (in Custom Order sort mode).
- Use tags on notes, contacts, and media for quick filtering.
- Store your wallet in a cloud folder (iCloud, Dropbox) for automatic cross-device sync.
- Lock your wallet manually from the More tab when stepping away.
- Change the app language from the login screen — no need to log in first.